Cherry Coconut Cake by Molly Brodak

You know that dusty old snowball coconut cake in the bakery case, the one covered in (cringe) raw shredded coconut? Basically just white cake with a teaspoon or so of coconut extract added?  I always tried ordering that guy, and was always disappointed. 

I love coconut. I love it so much, I wanted to rescue coconut cake from this snowball let down. 

                                  nah

                                  nah

Somewhere around here I have a list of things I will never feed people, things like raw shortening in "butter"cream and raw, stringy, flavorless, untoasted coconut is on that list. If you don't have this beautiful green fondant and beautiful fresh flower arrangement by Caroline Worth-Bruno like I have for my coconut cake, go ahead and snowball your coconut cake but for the love of god, toast your damn coconut first.

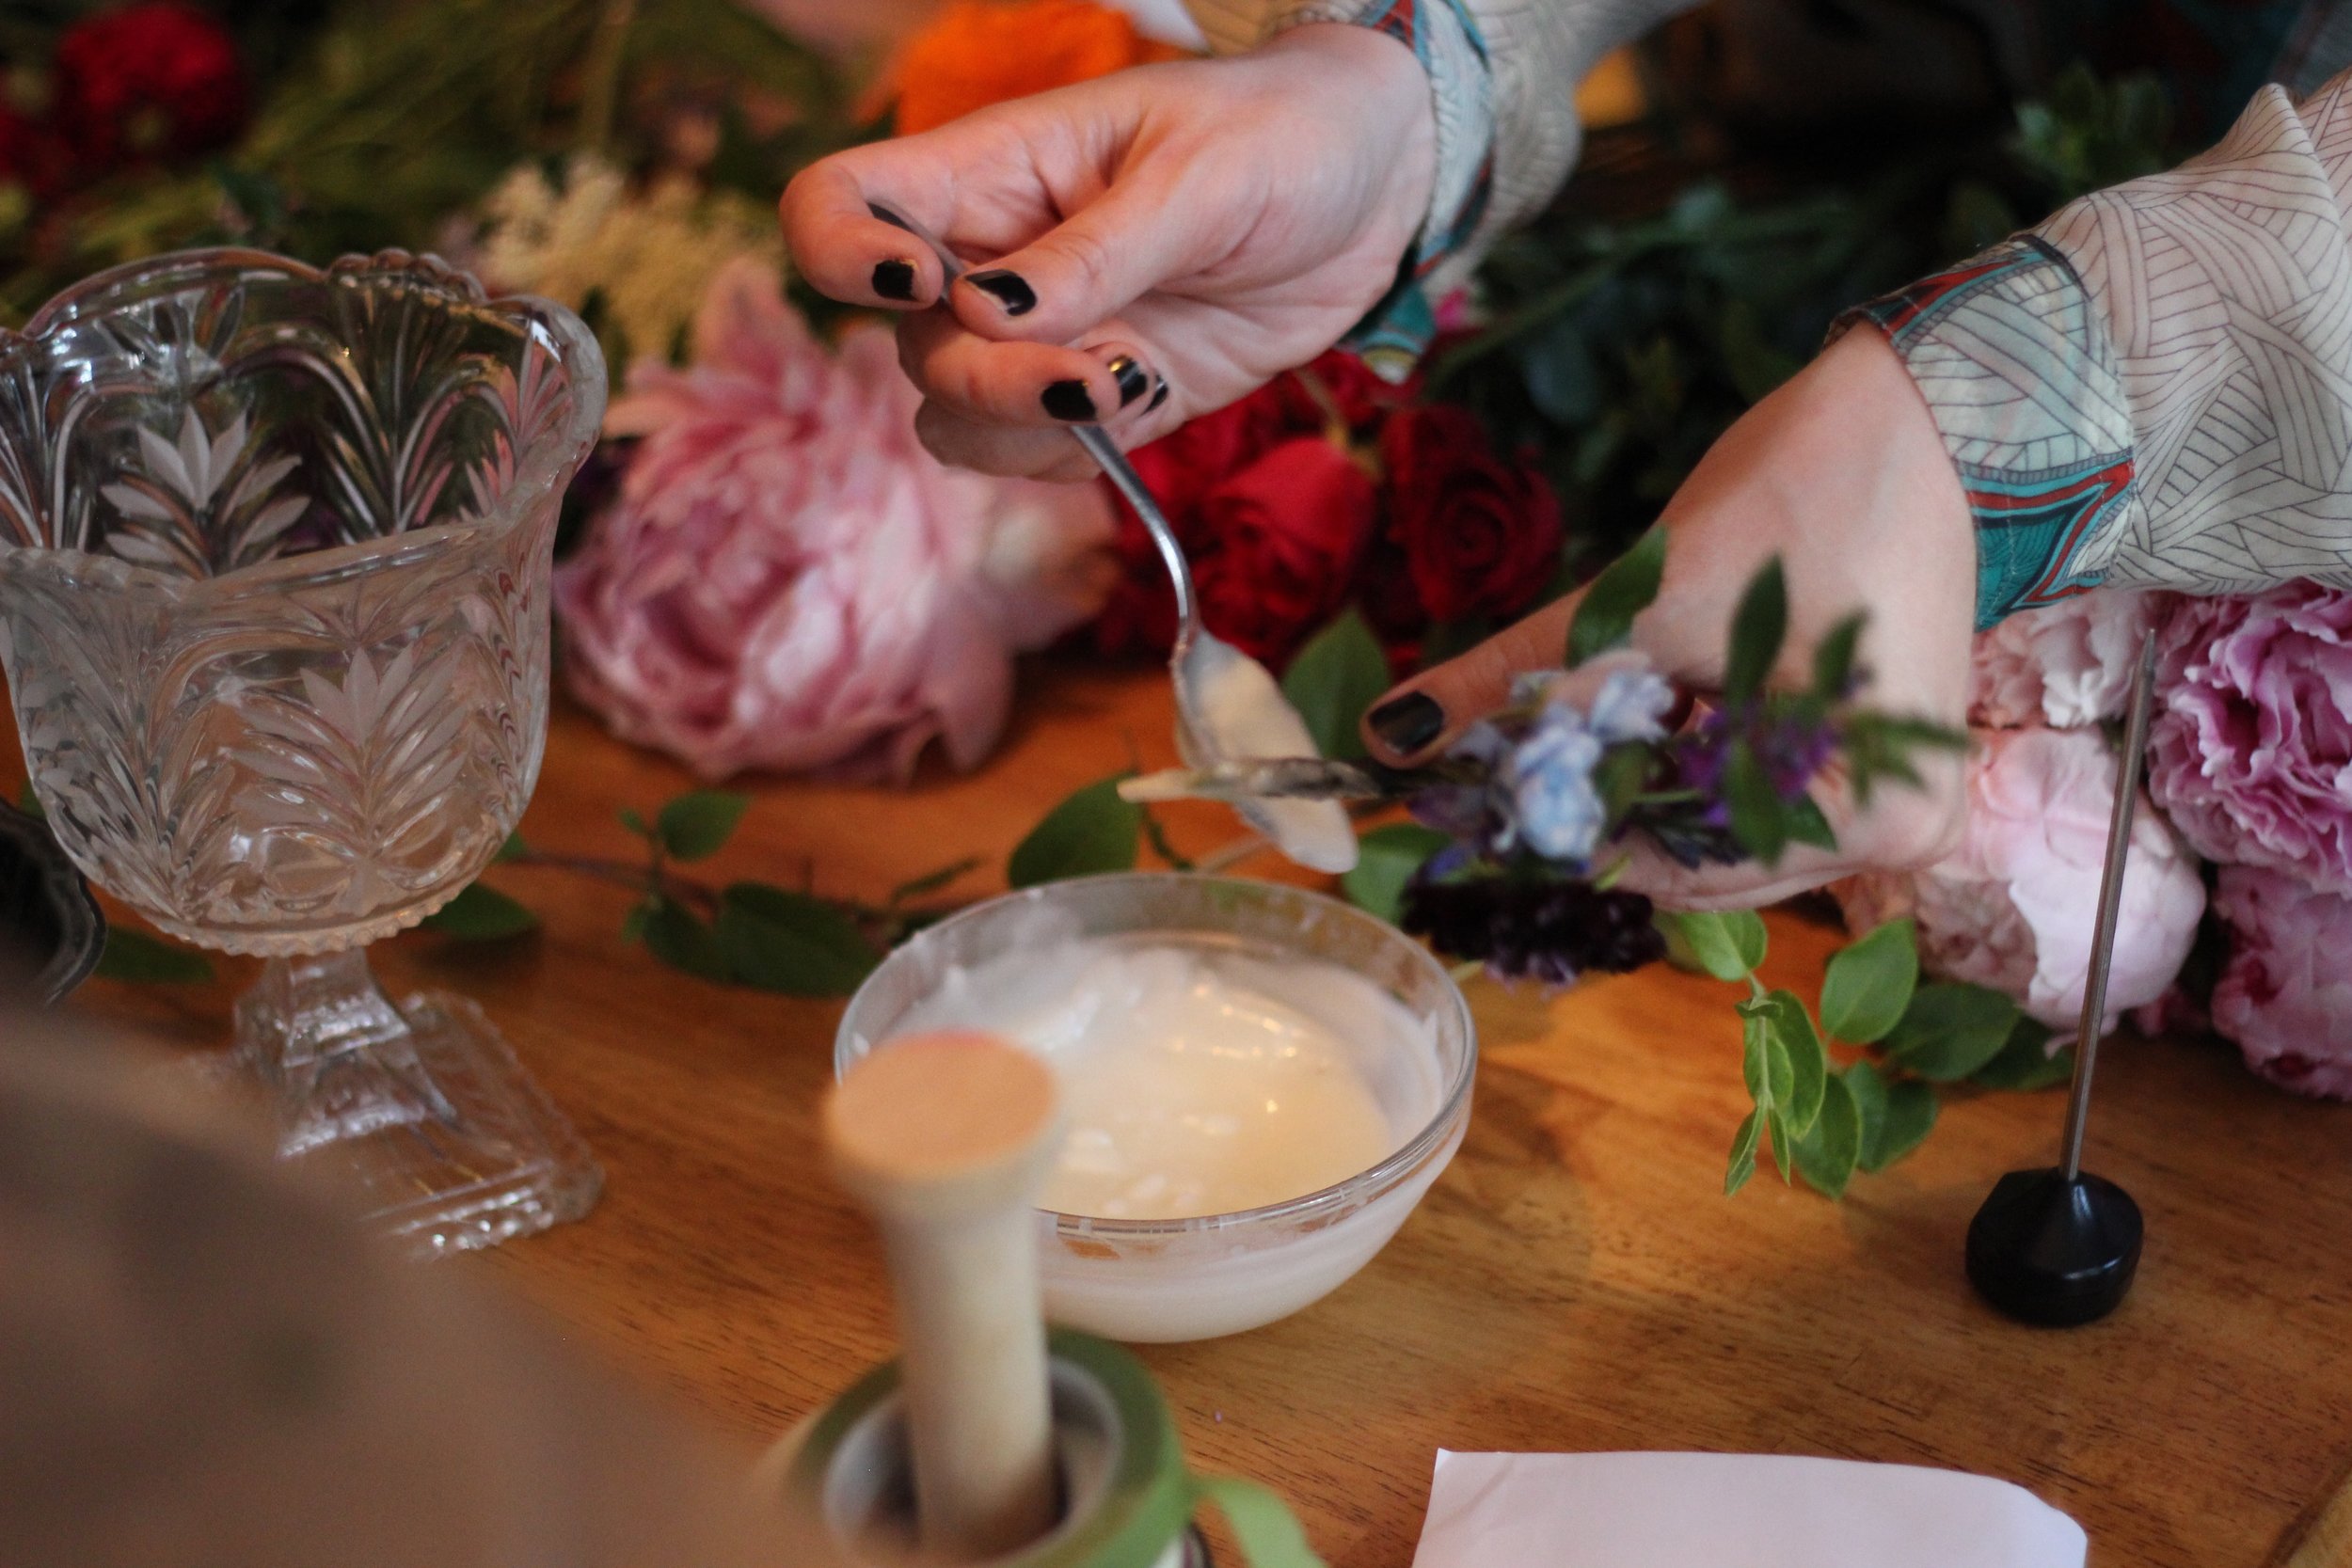
Like I said, I was lucky enough to get to sit back and document Caroline Worth-Bruno's amazing flower arranging talent take over my cake. Every step of the process produced a moment of beauty, and by the end she said "I wish you were always there to watch me arrange" because I kept gasping in delight and/or applauding every time she added a new element. 

transfixing magic

transfixing magic

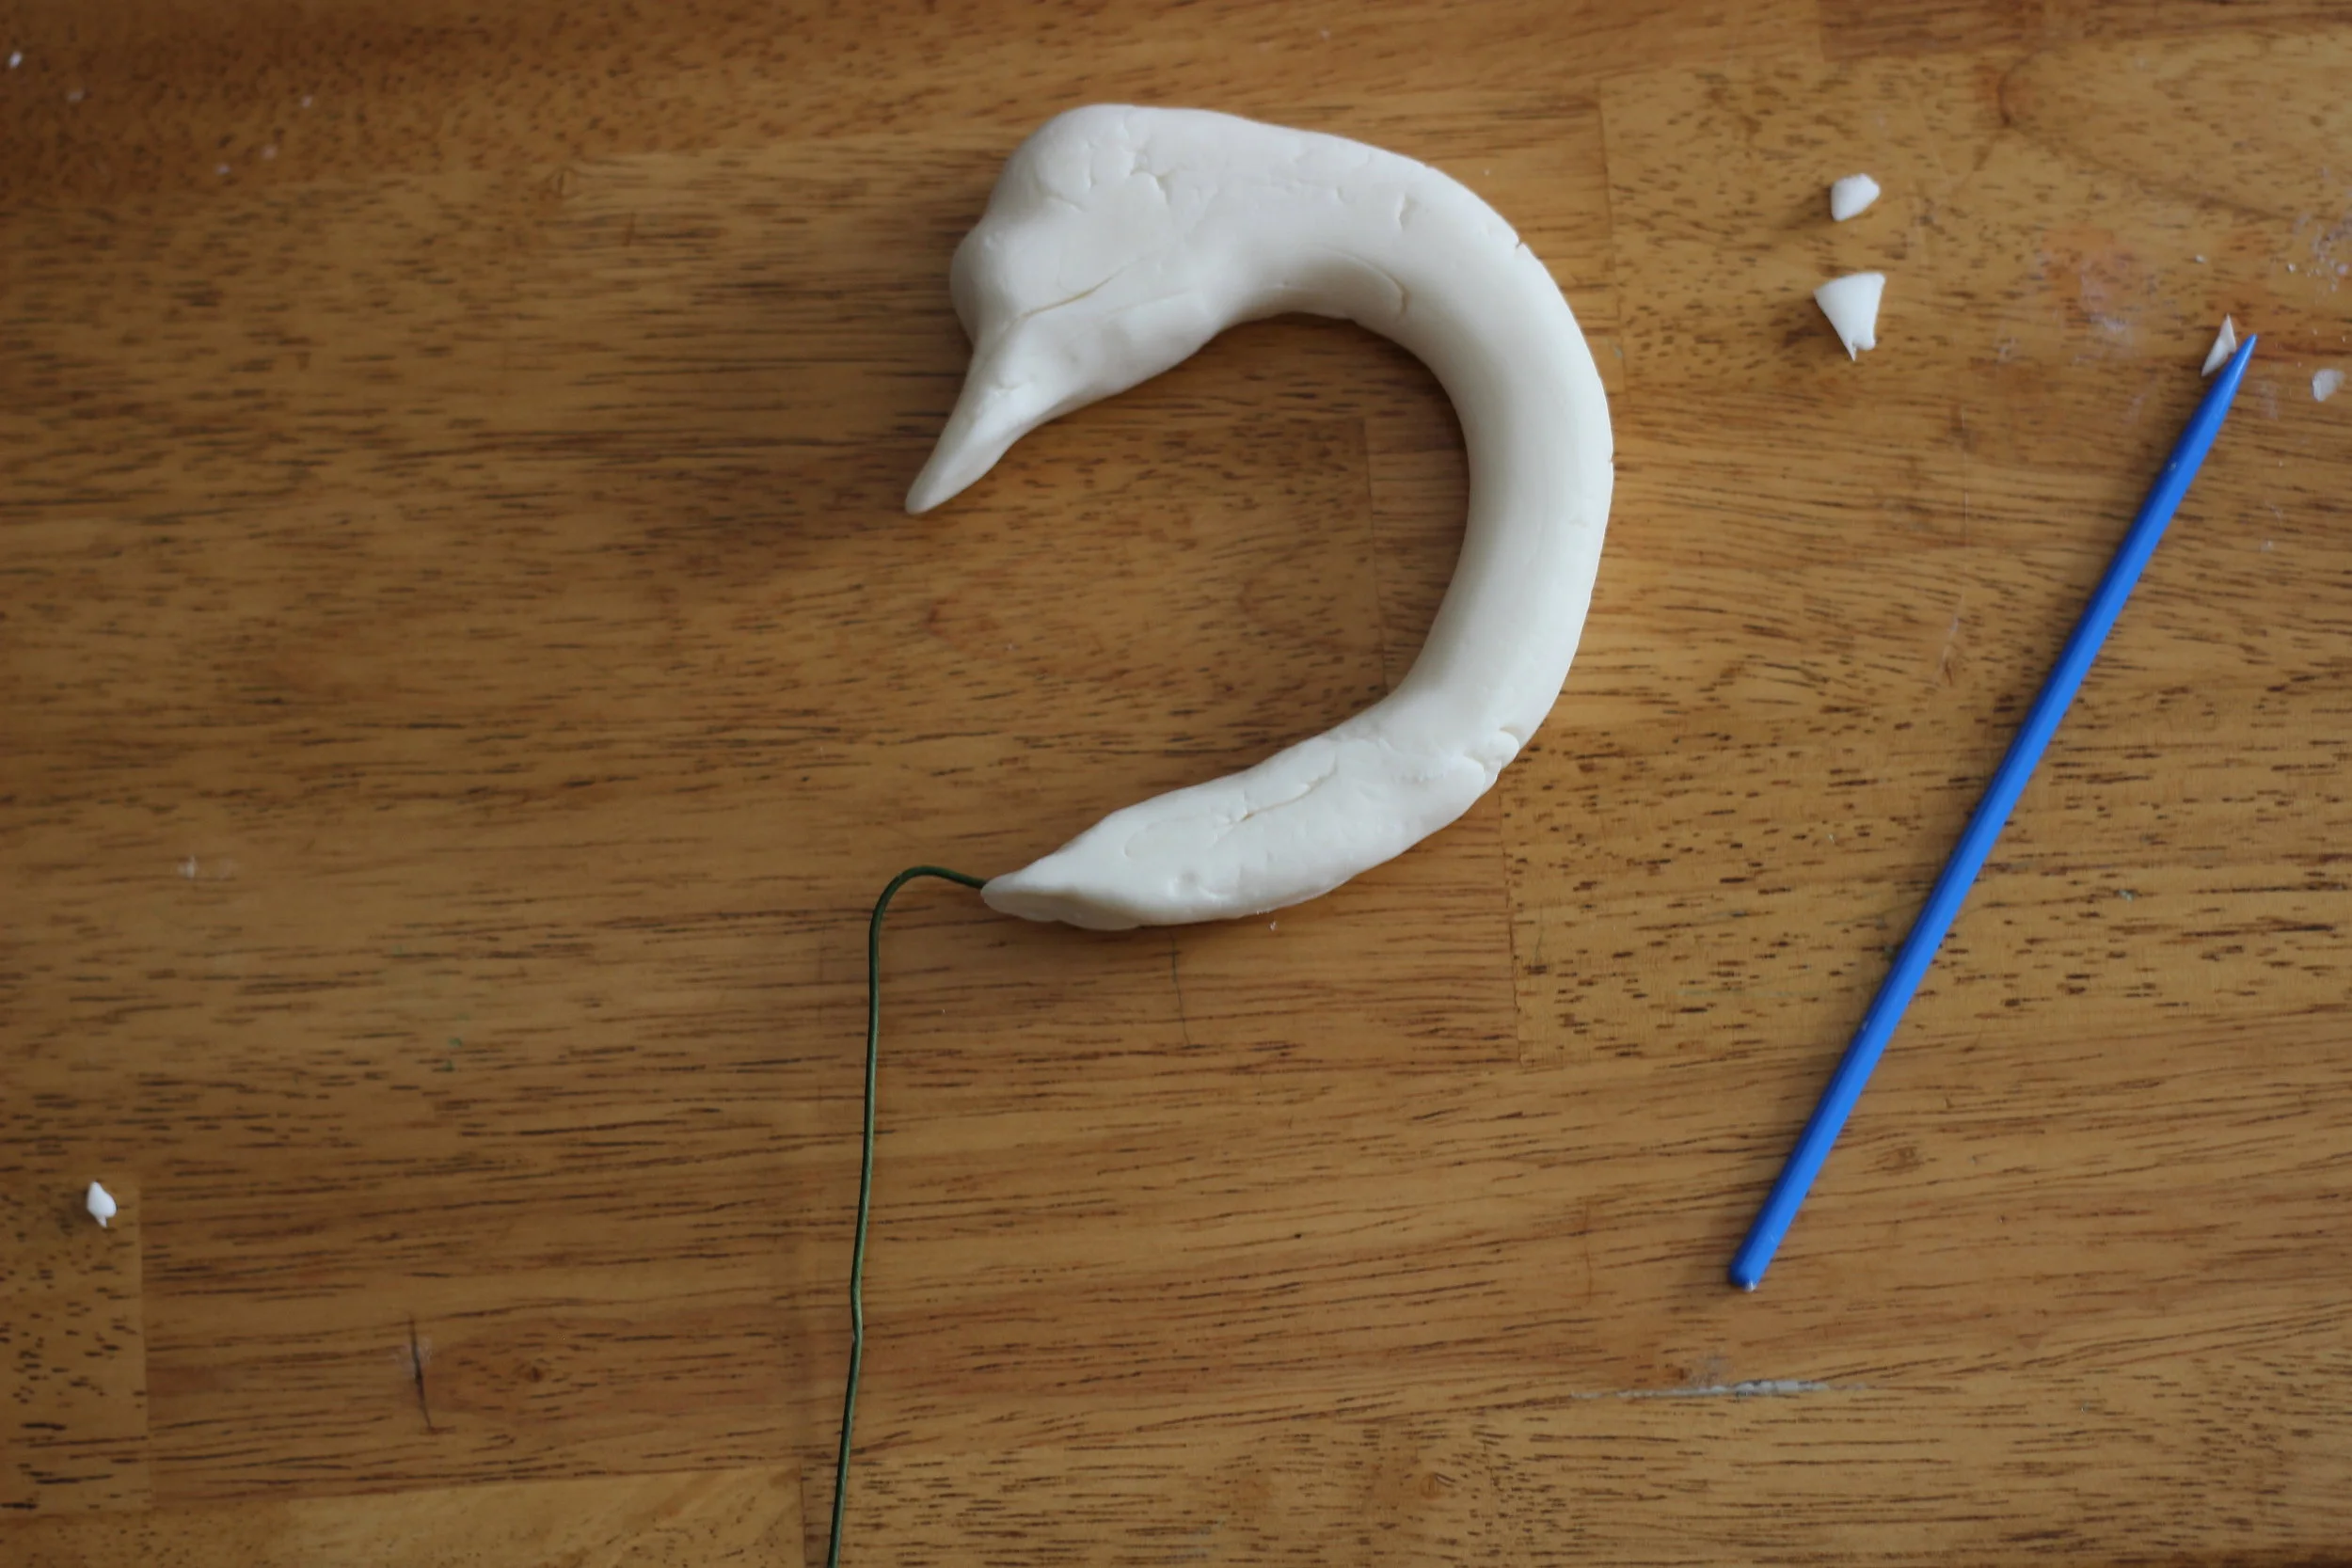
 When it comes to fresh flowers on cakes, there are many methods for creating a food safe barrier between these inedible (and often pesticide-laden) beauties, including flower picks, melted chocolate, saran wrap, etc, but I thought I'd try out this FDA approved food safe method that seemed ideal to me: soy wax.

The stems were dipped in wax and left to harden for a while, and it worked quite well, with the wax remaining in place on the stem and not transferring into the cake (be sure to poke a hole first though).

After the pastel moment of spring and weddings, we both craved a bit of intensity and color, and were not disappointed with the end result.

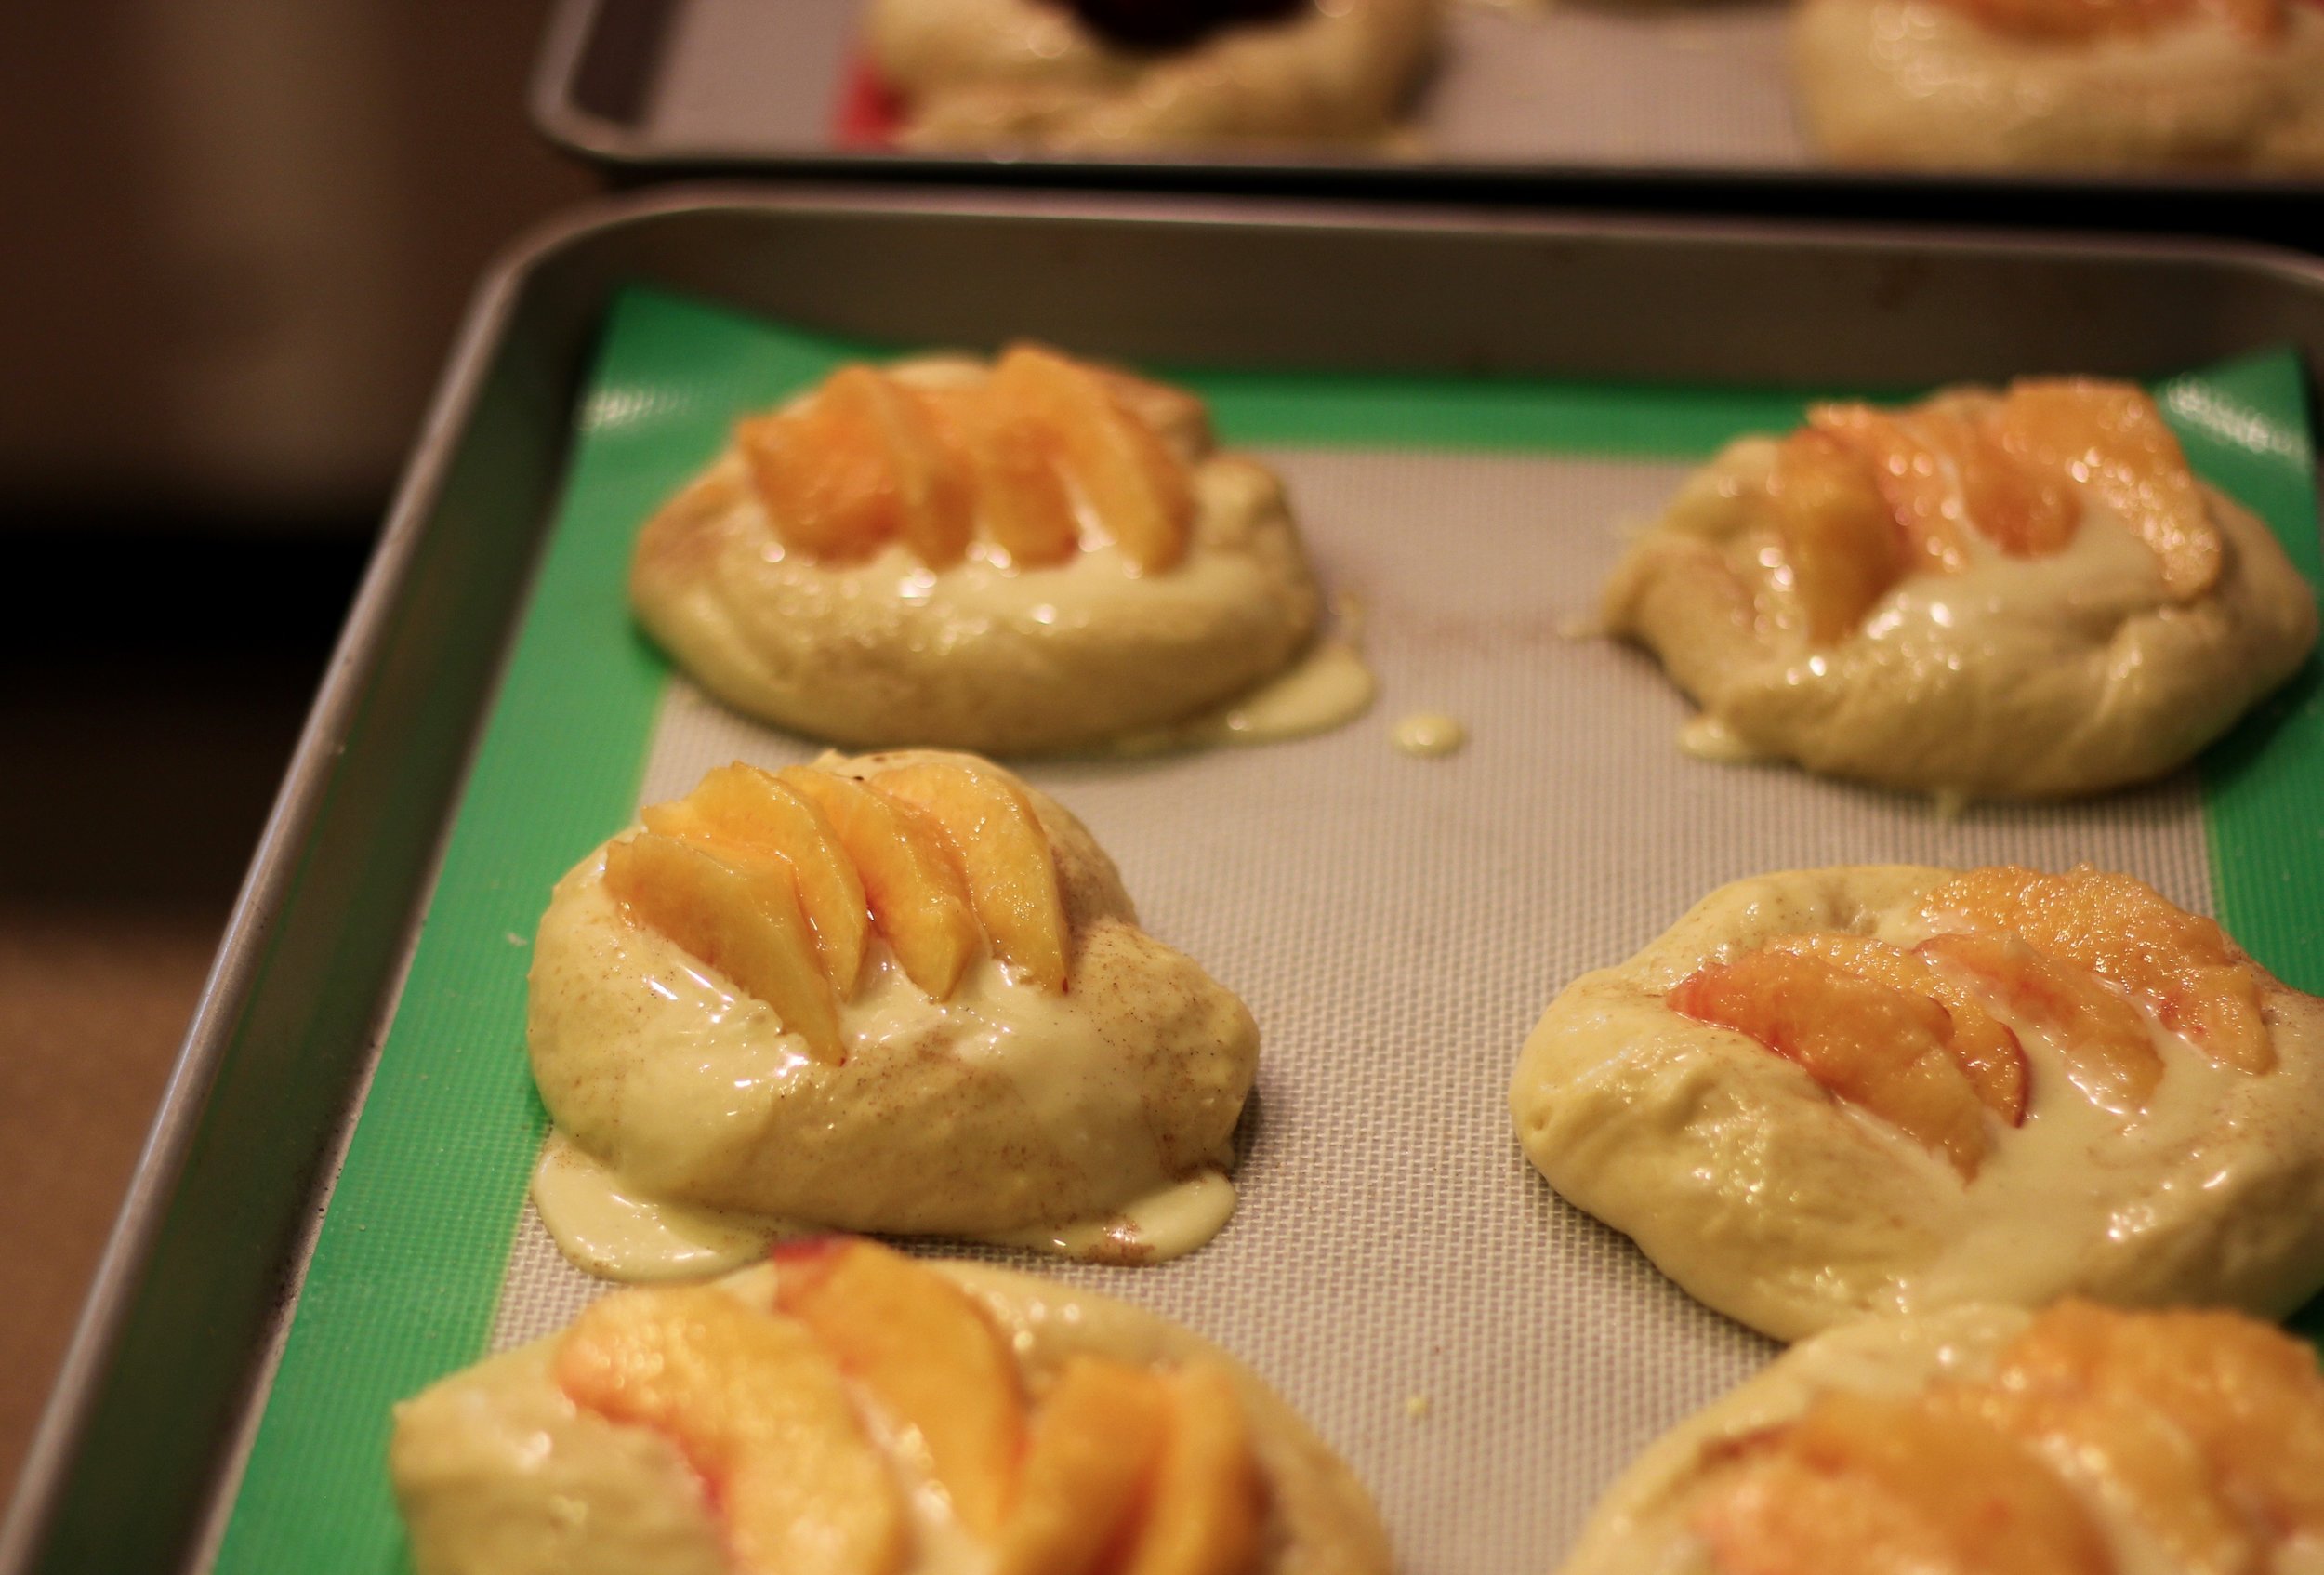
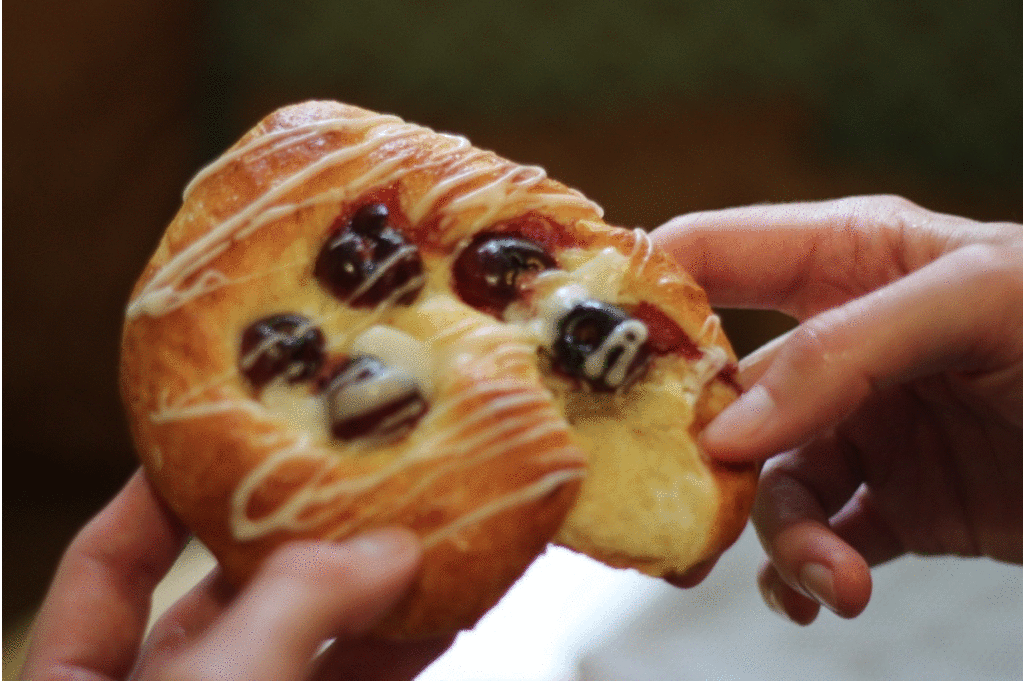
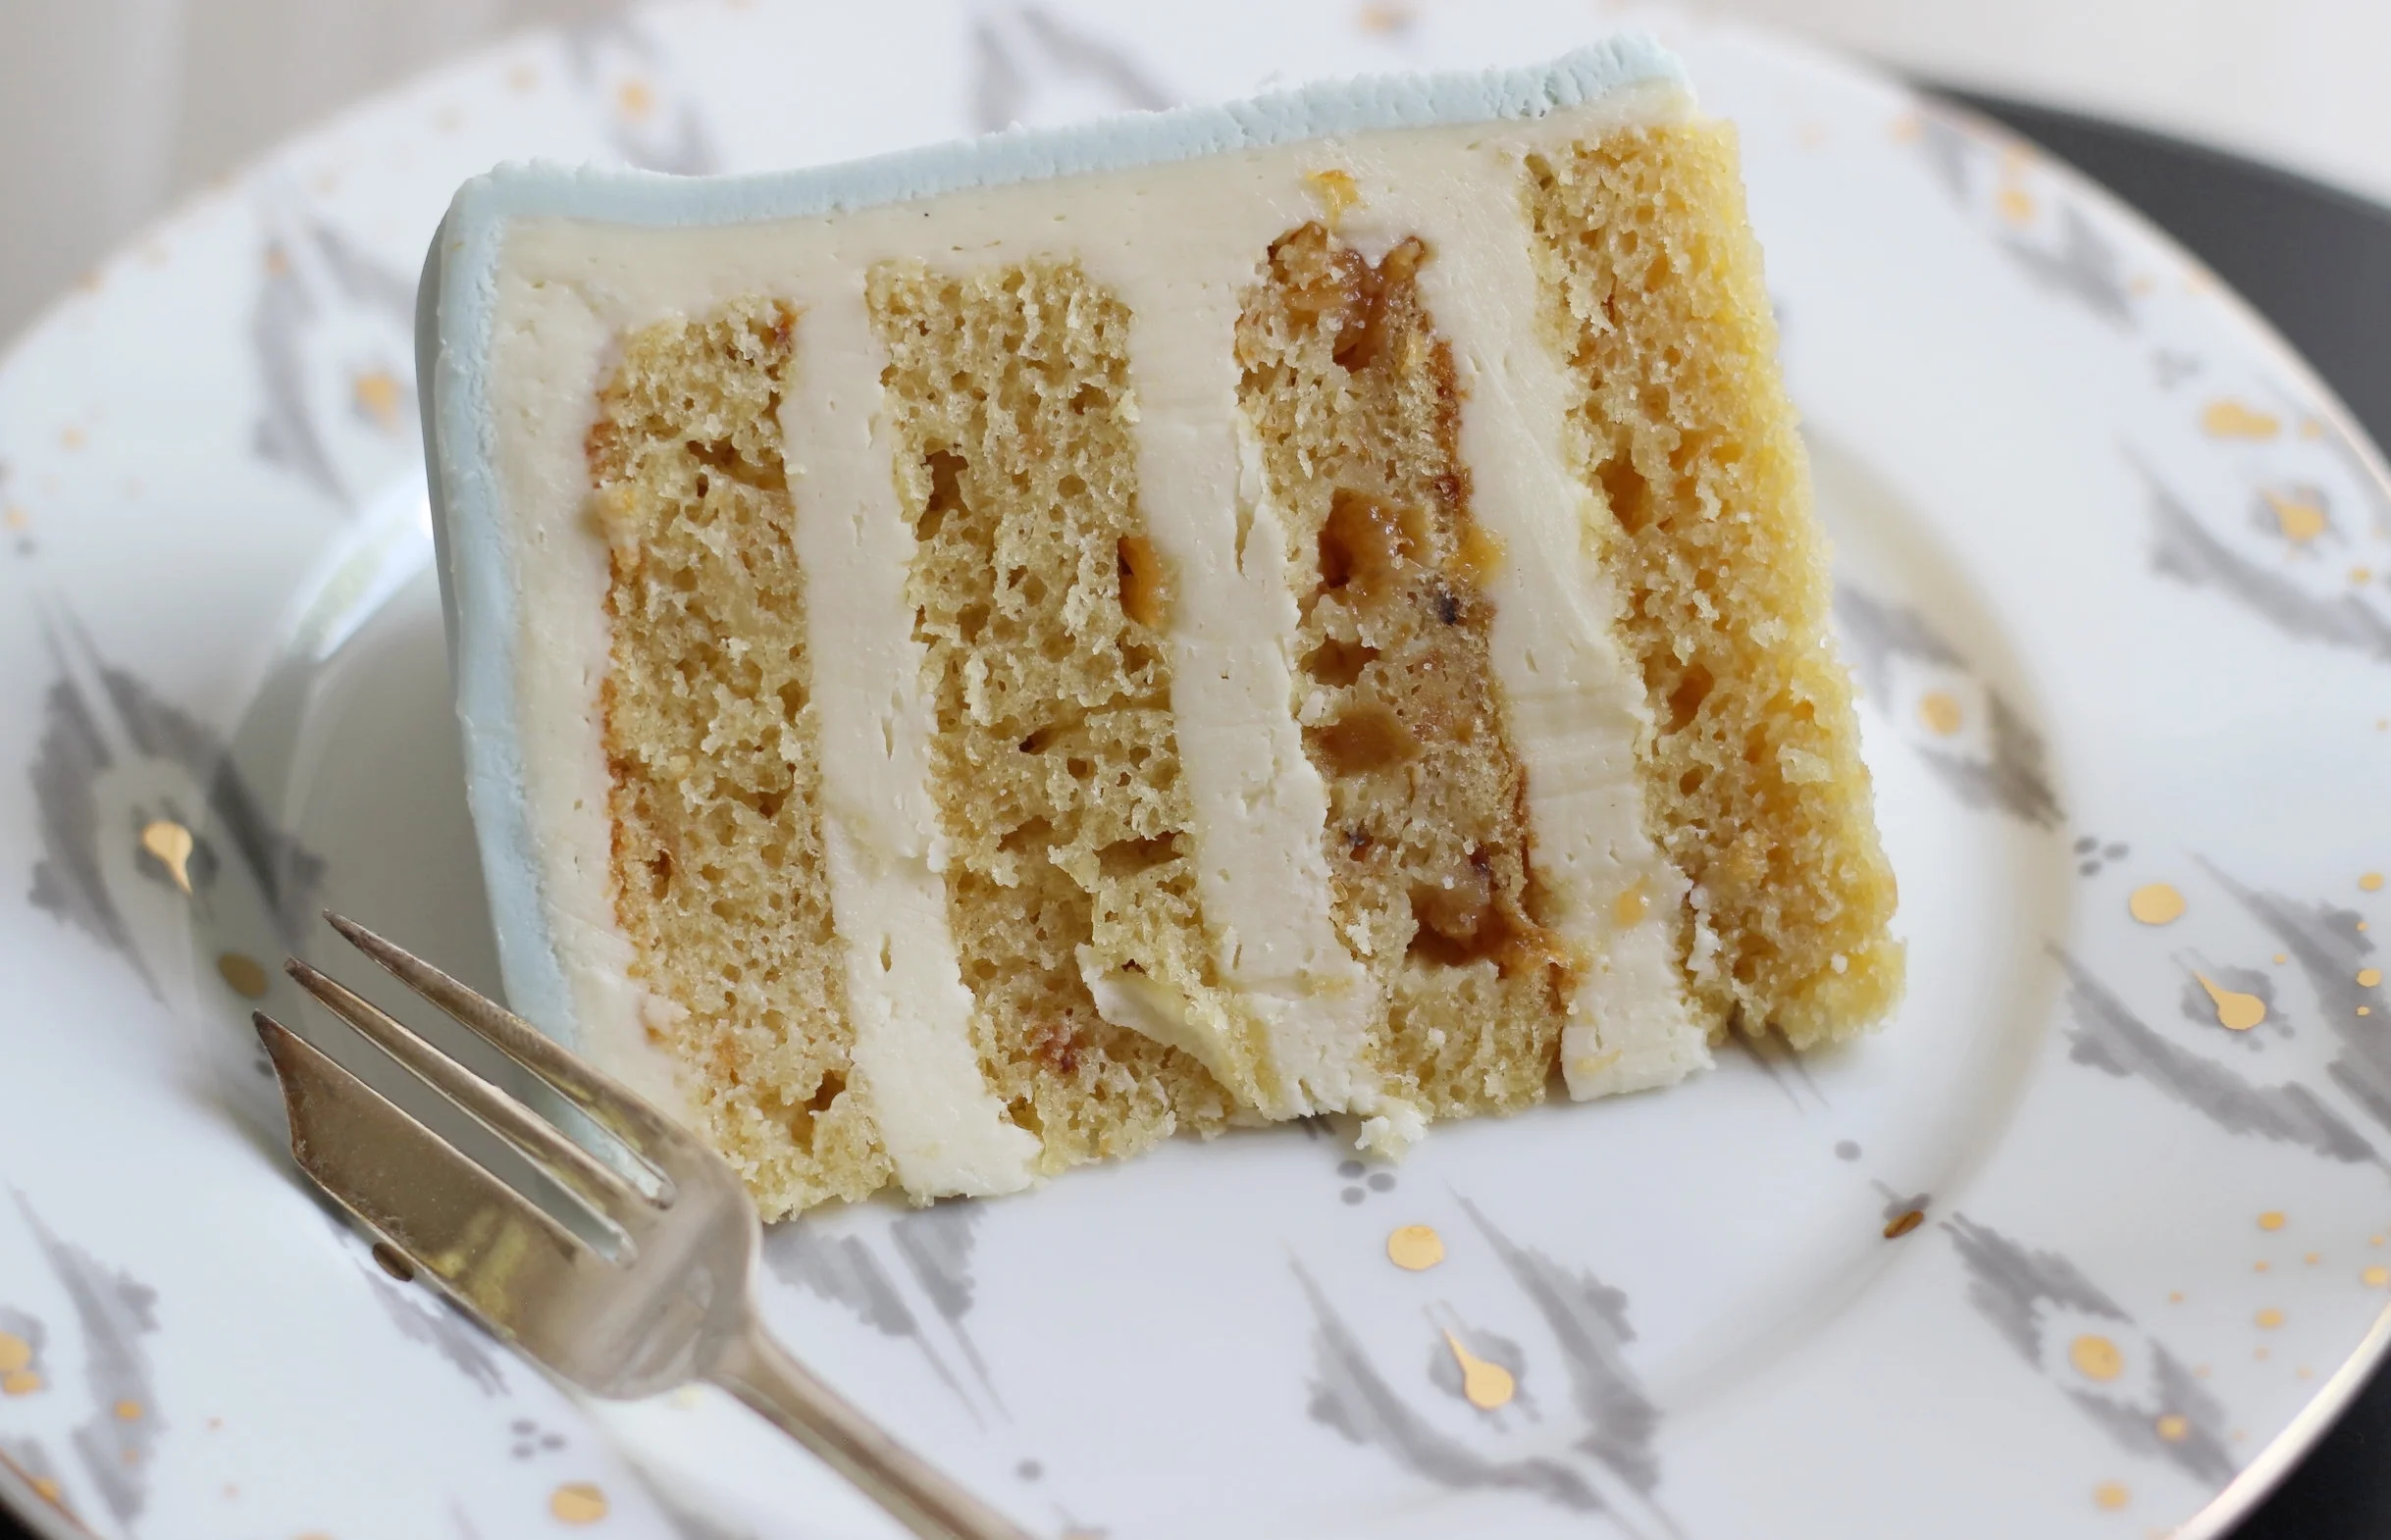
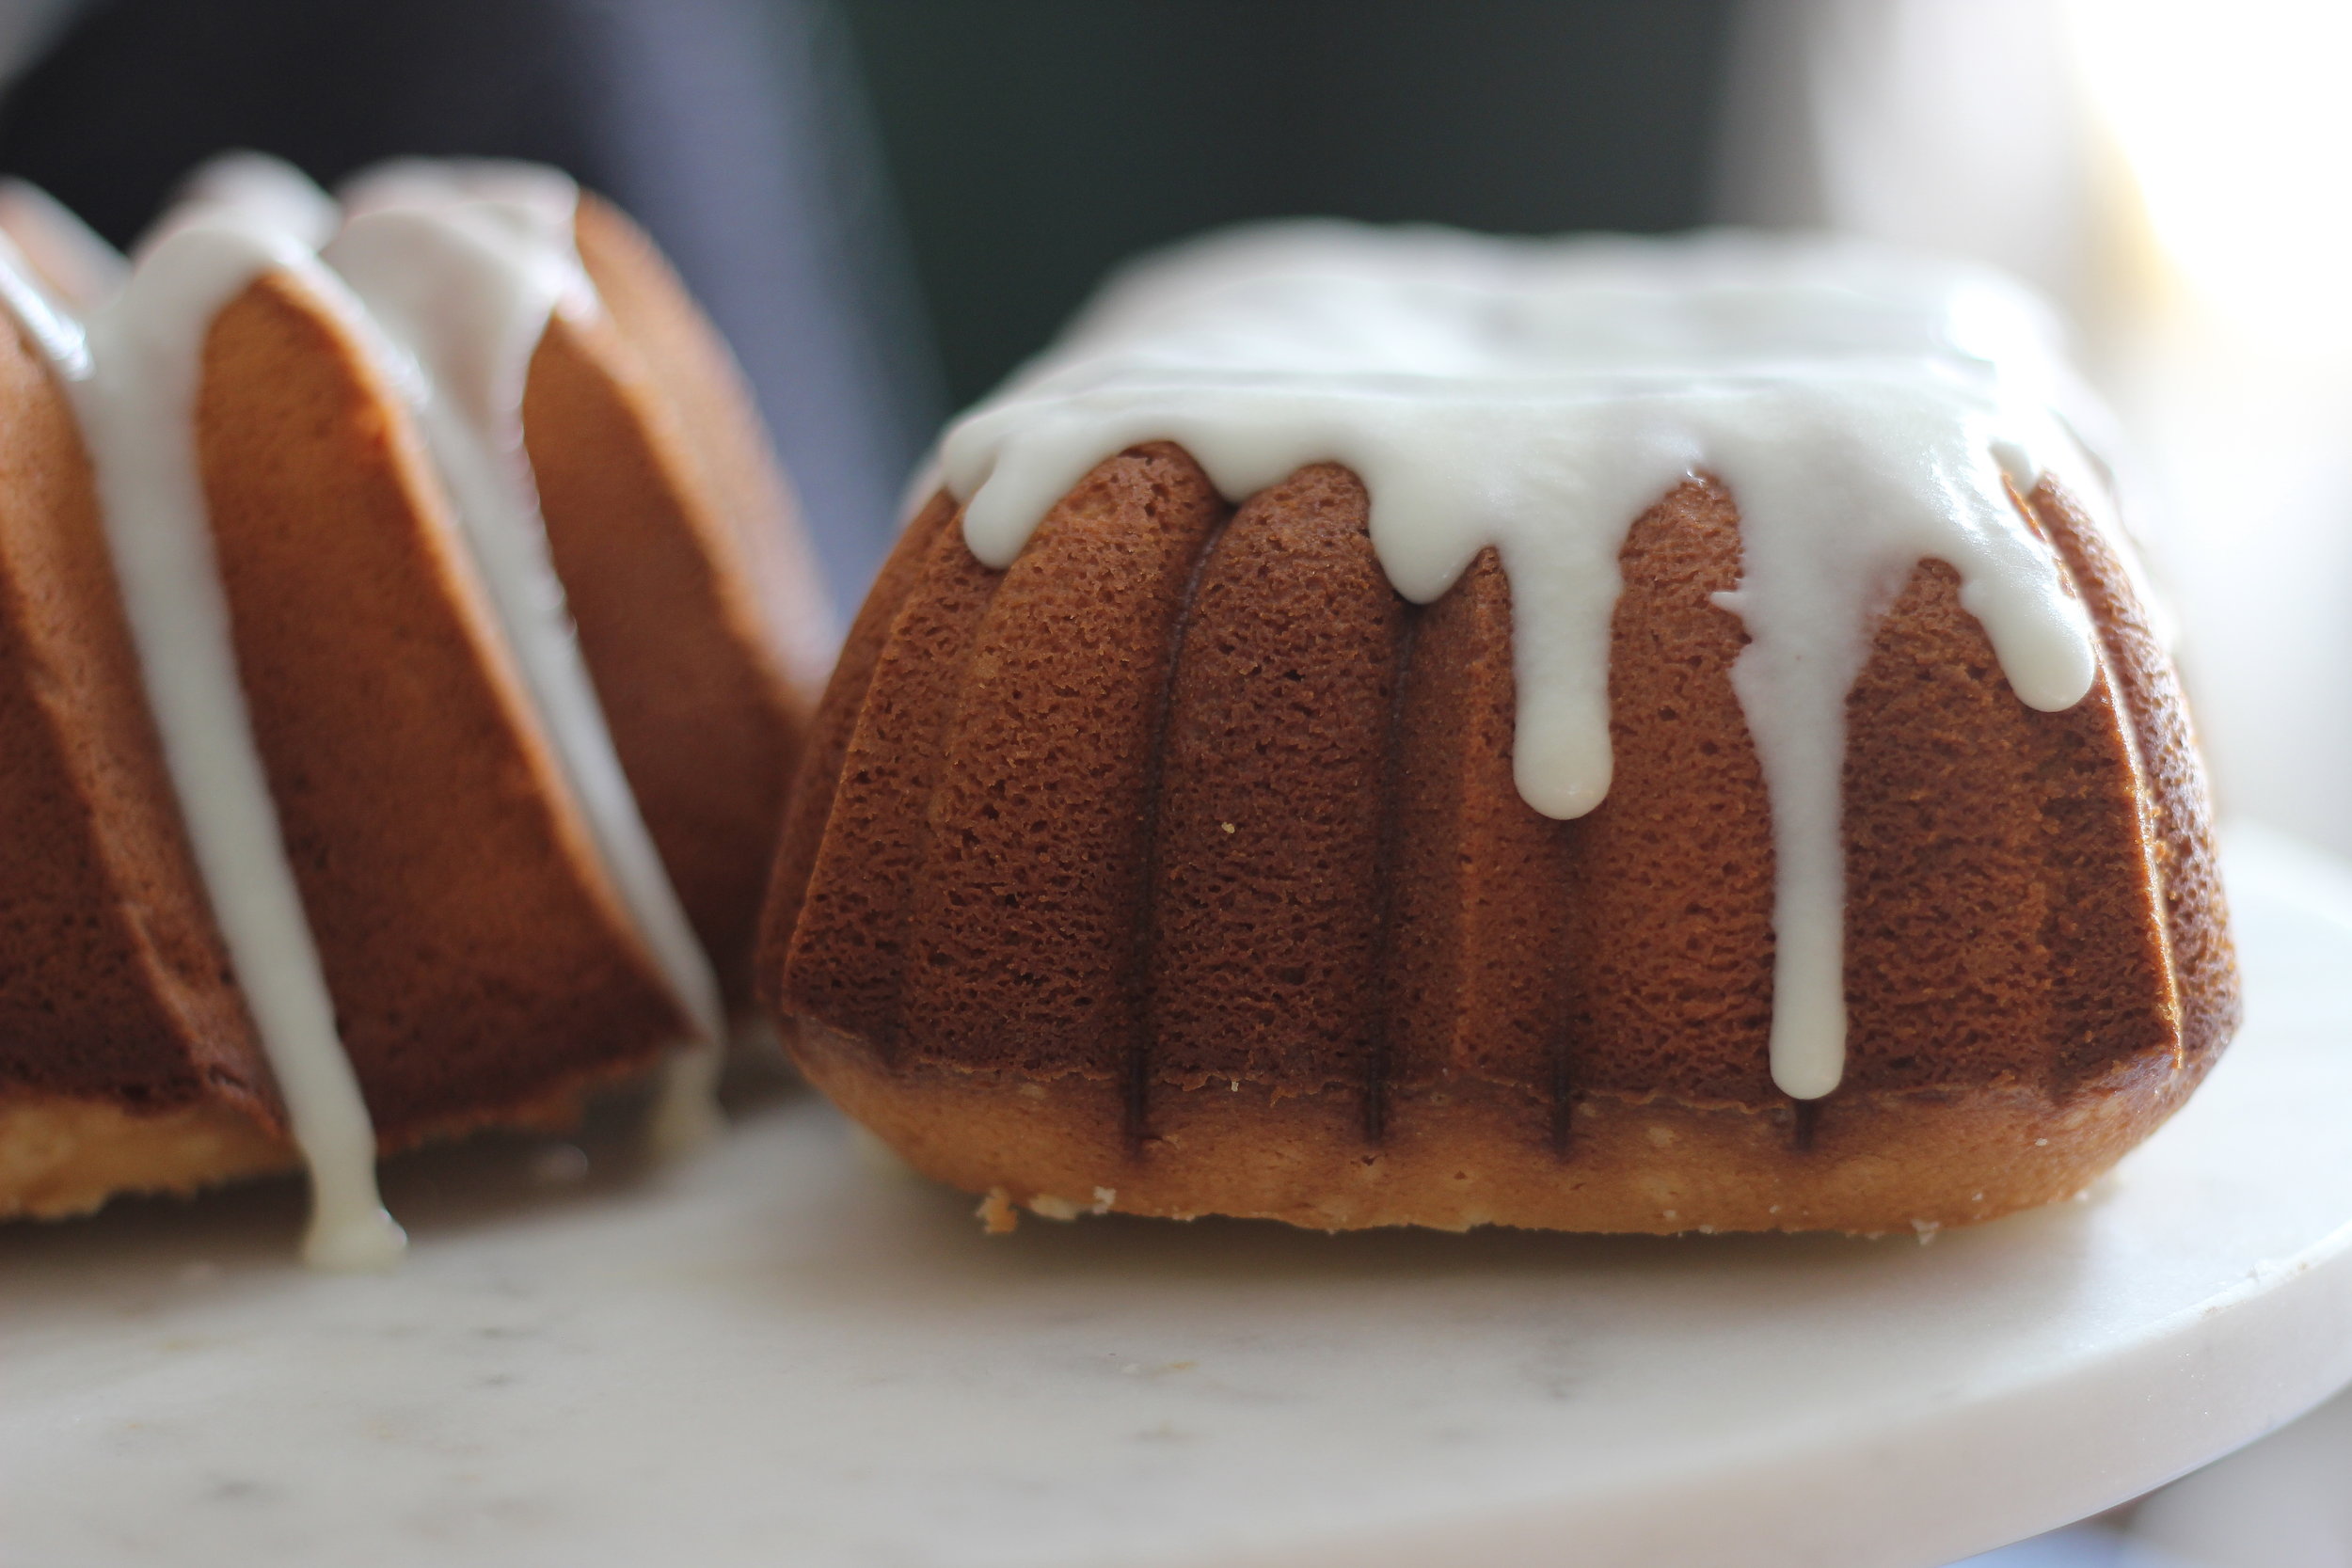
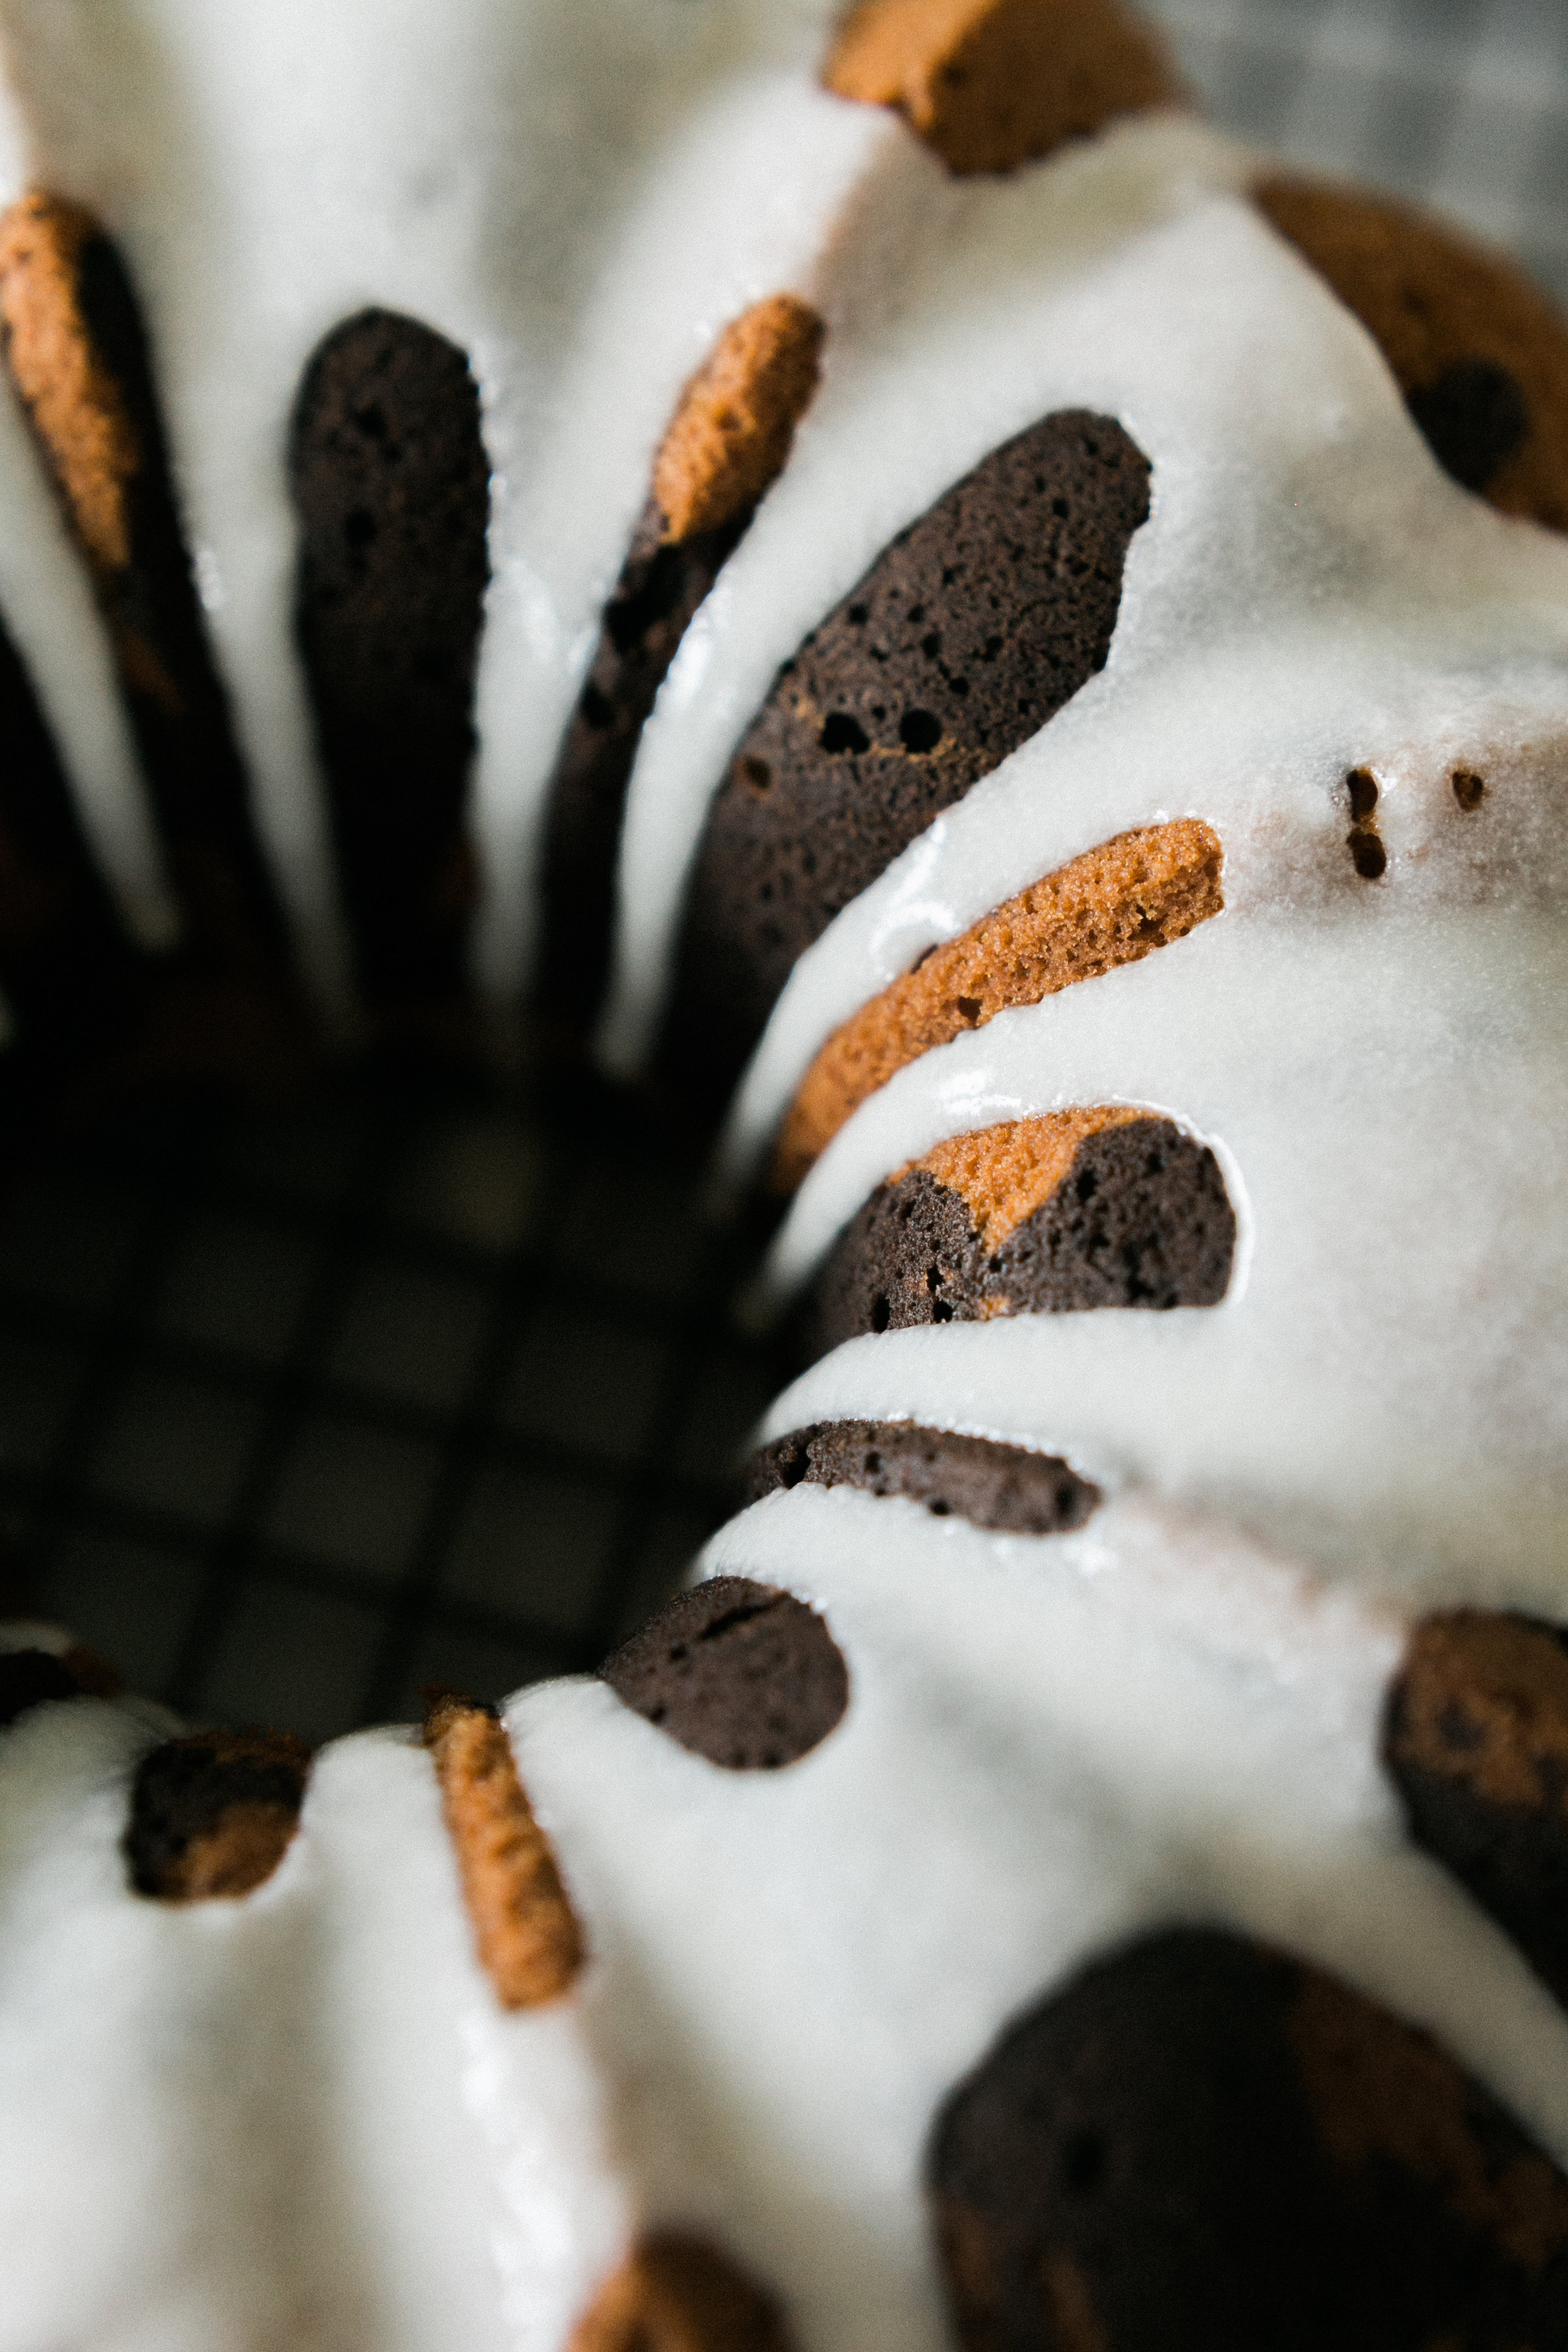
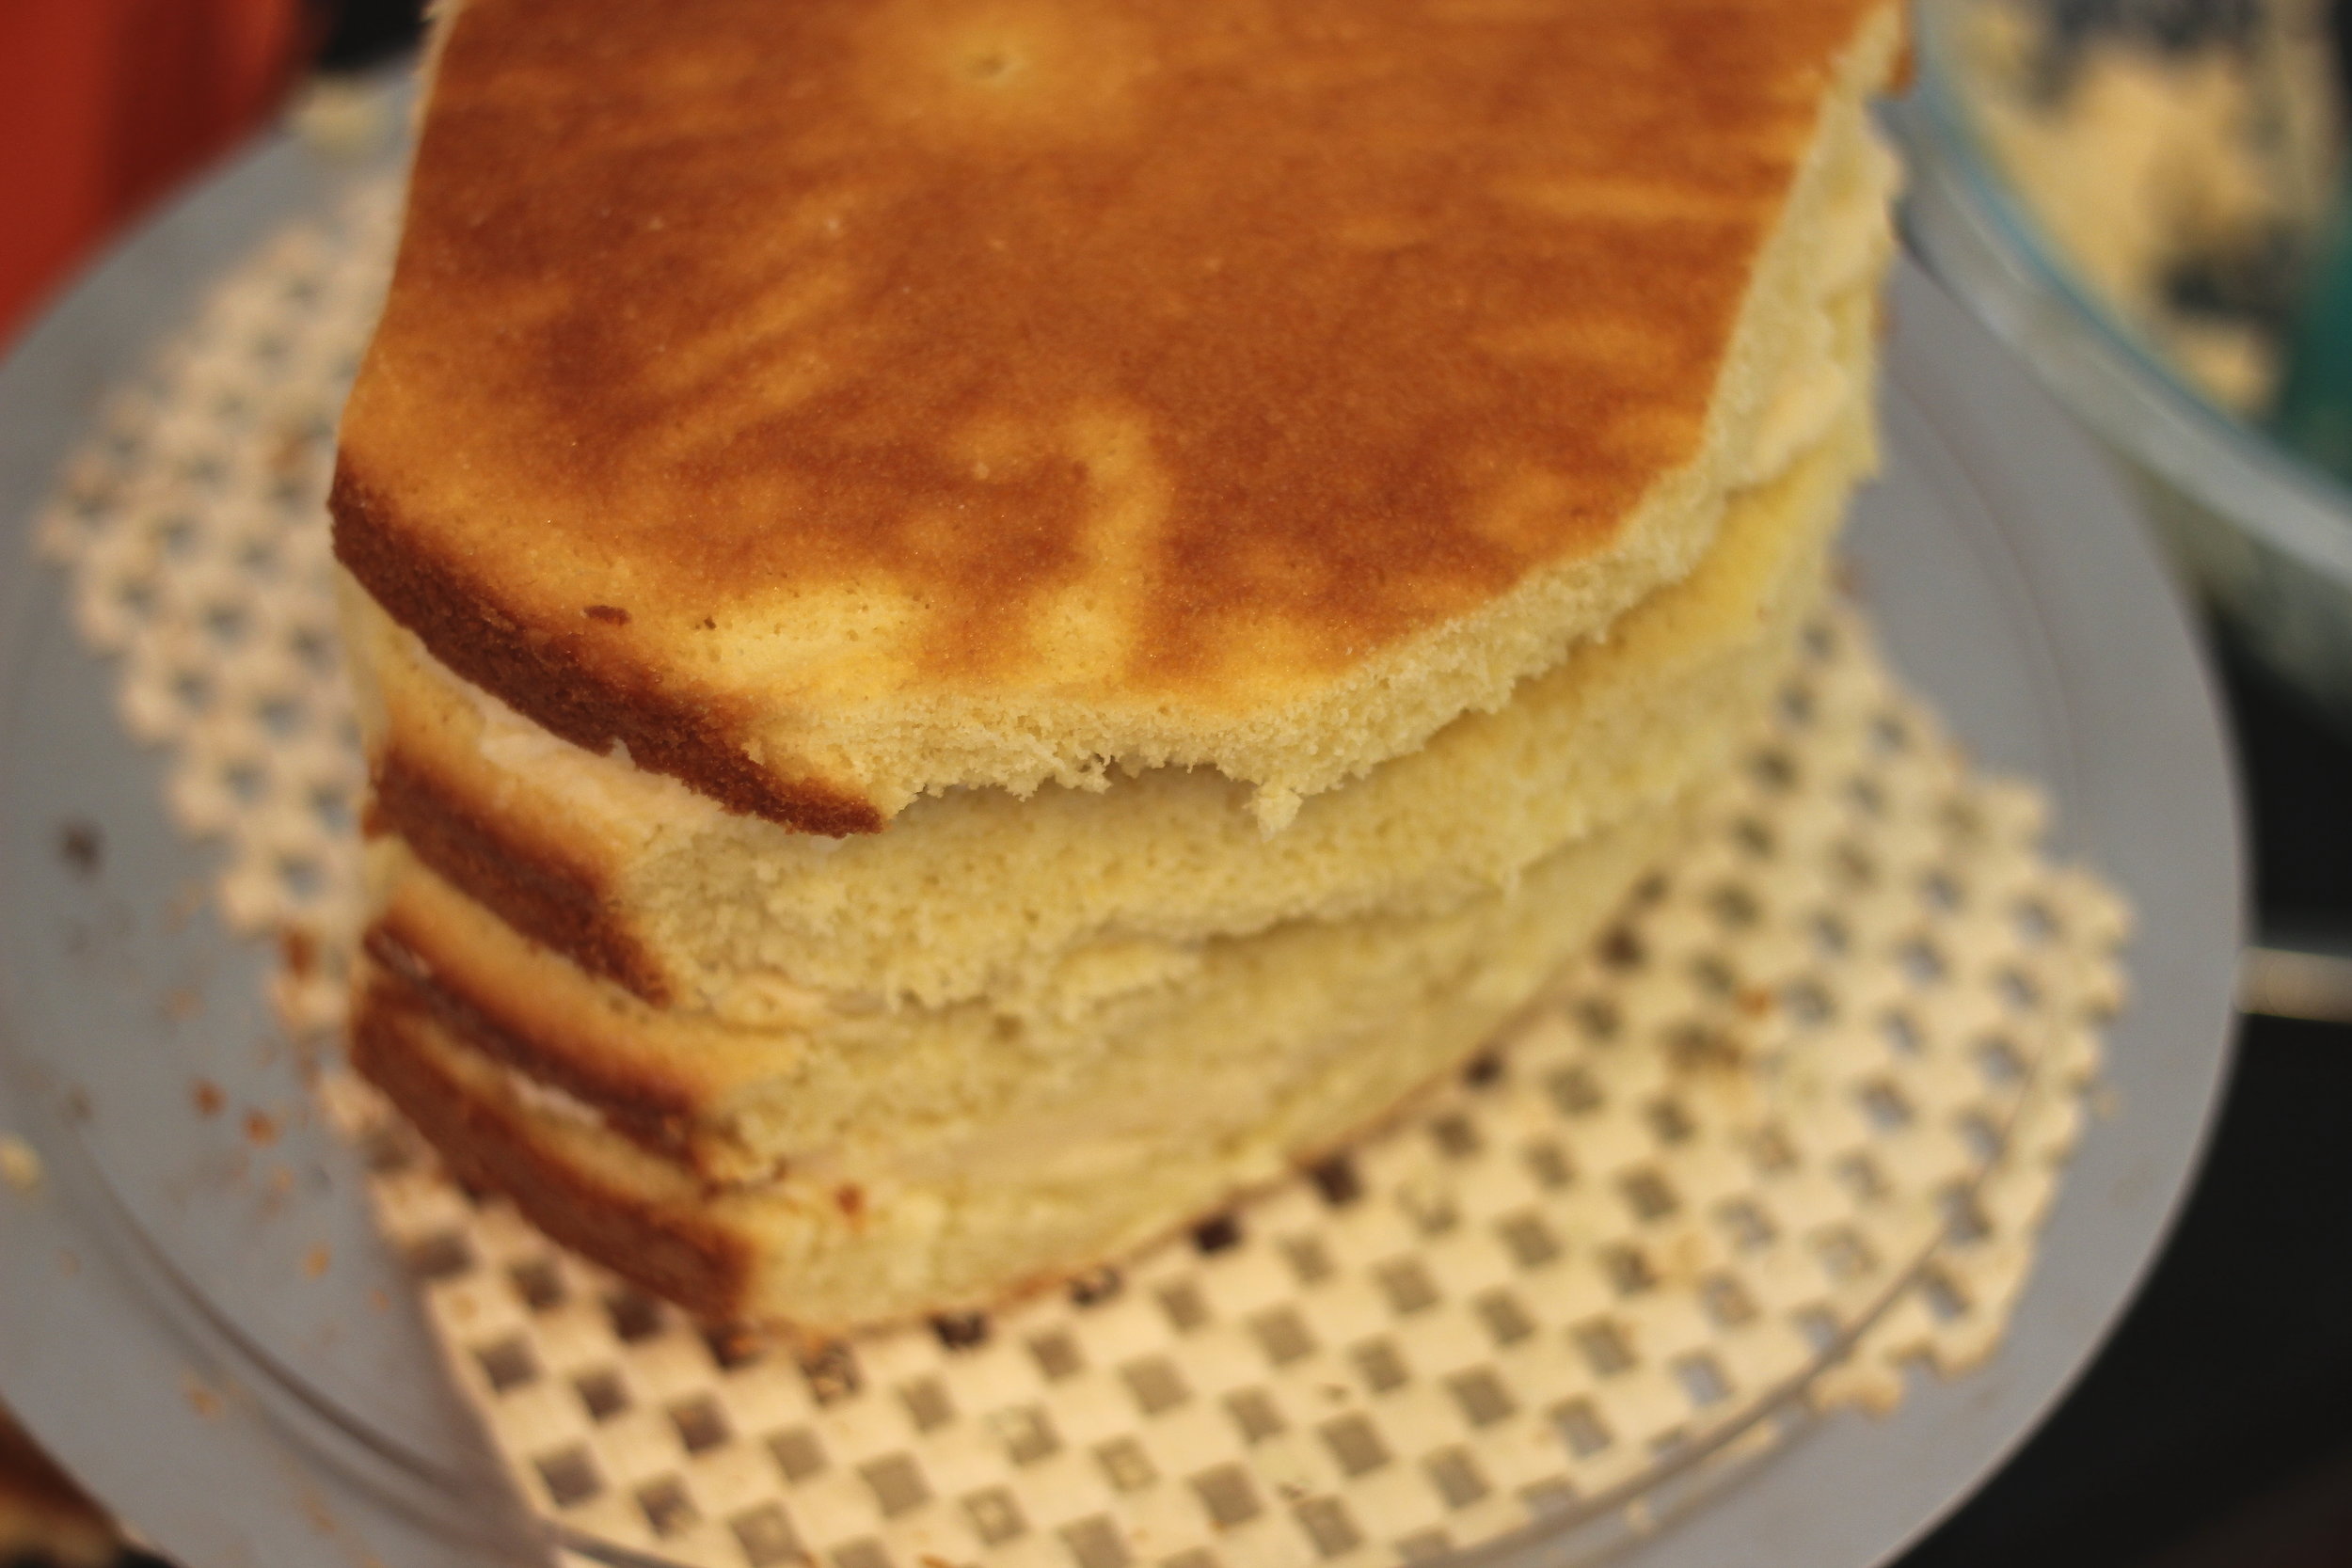
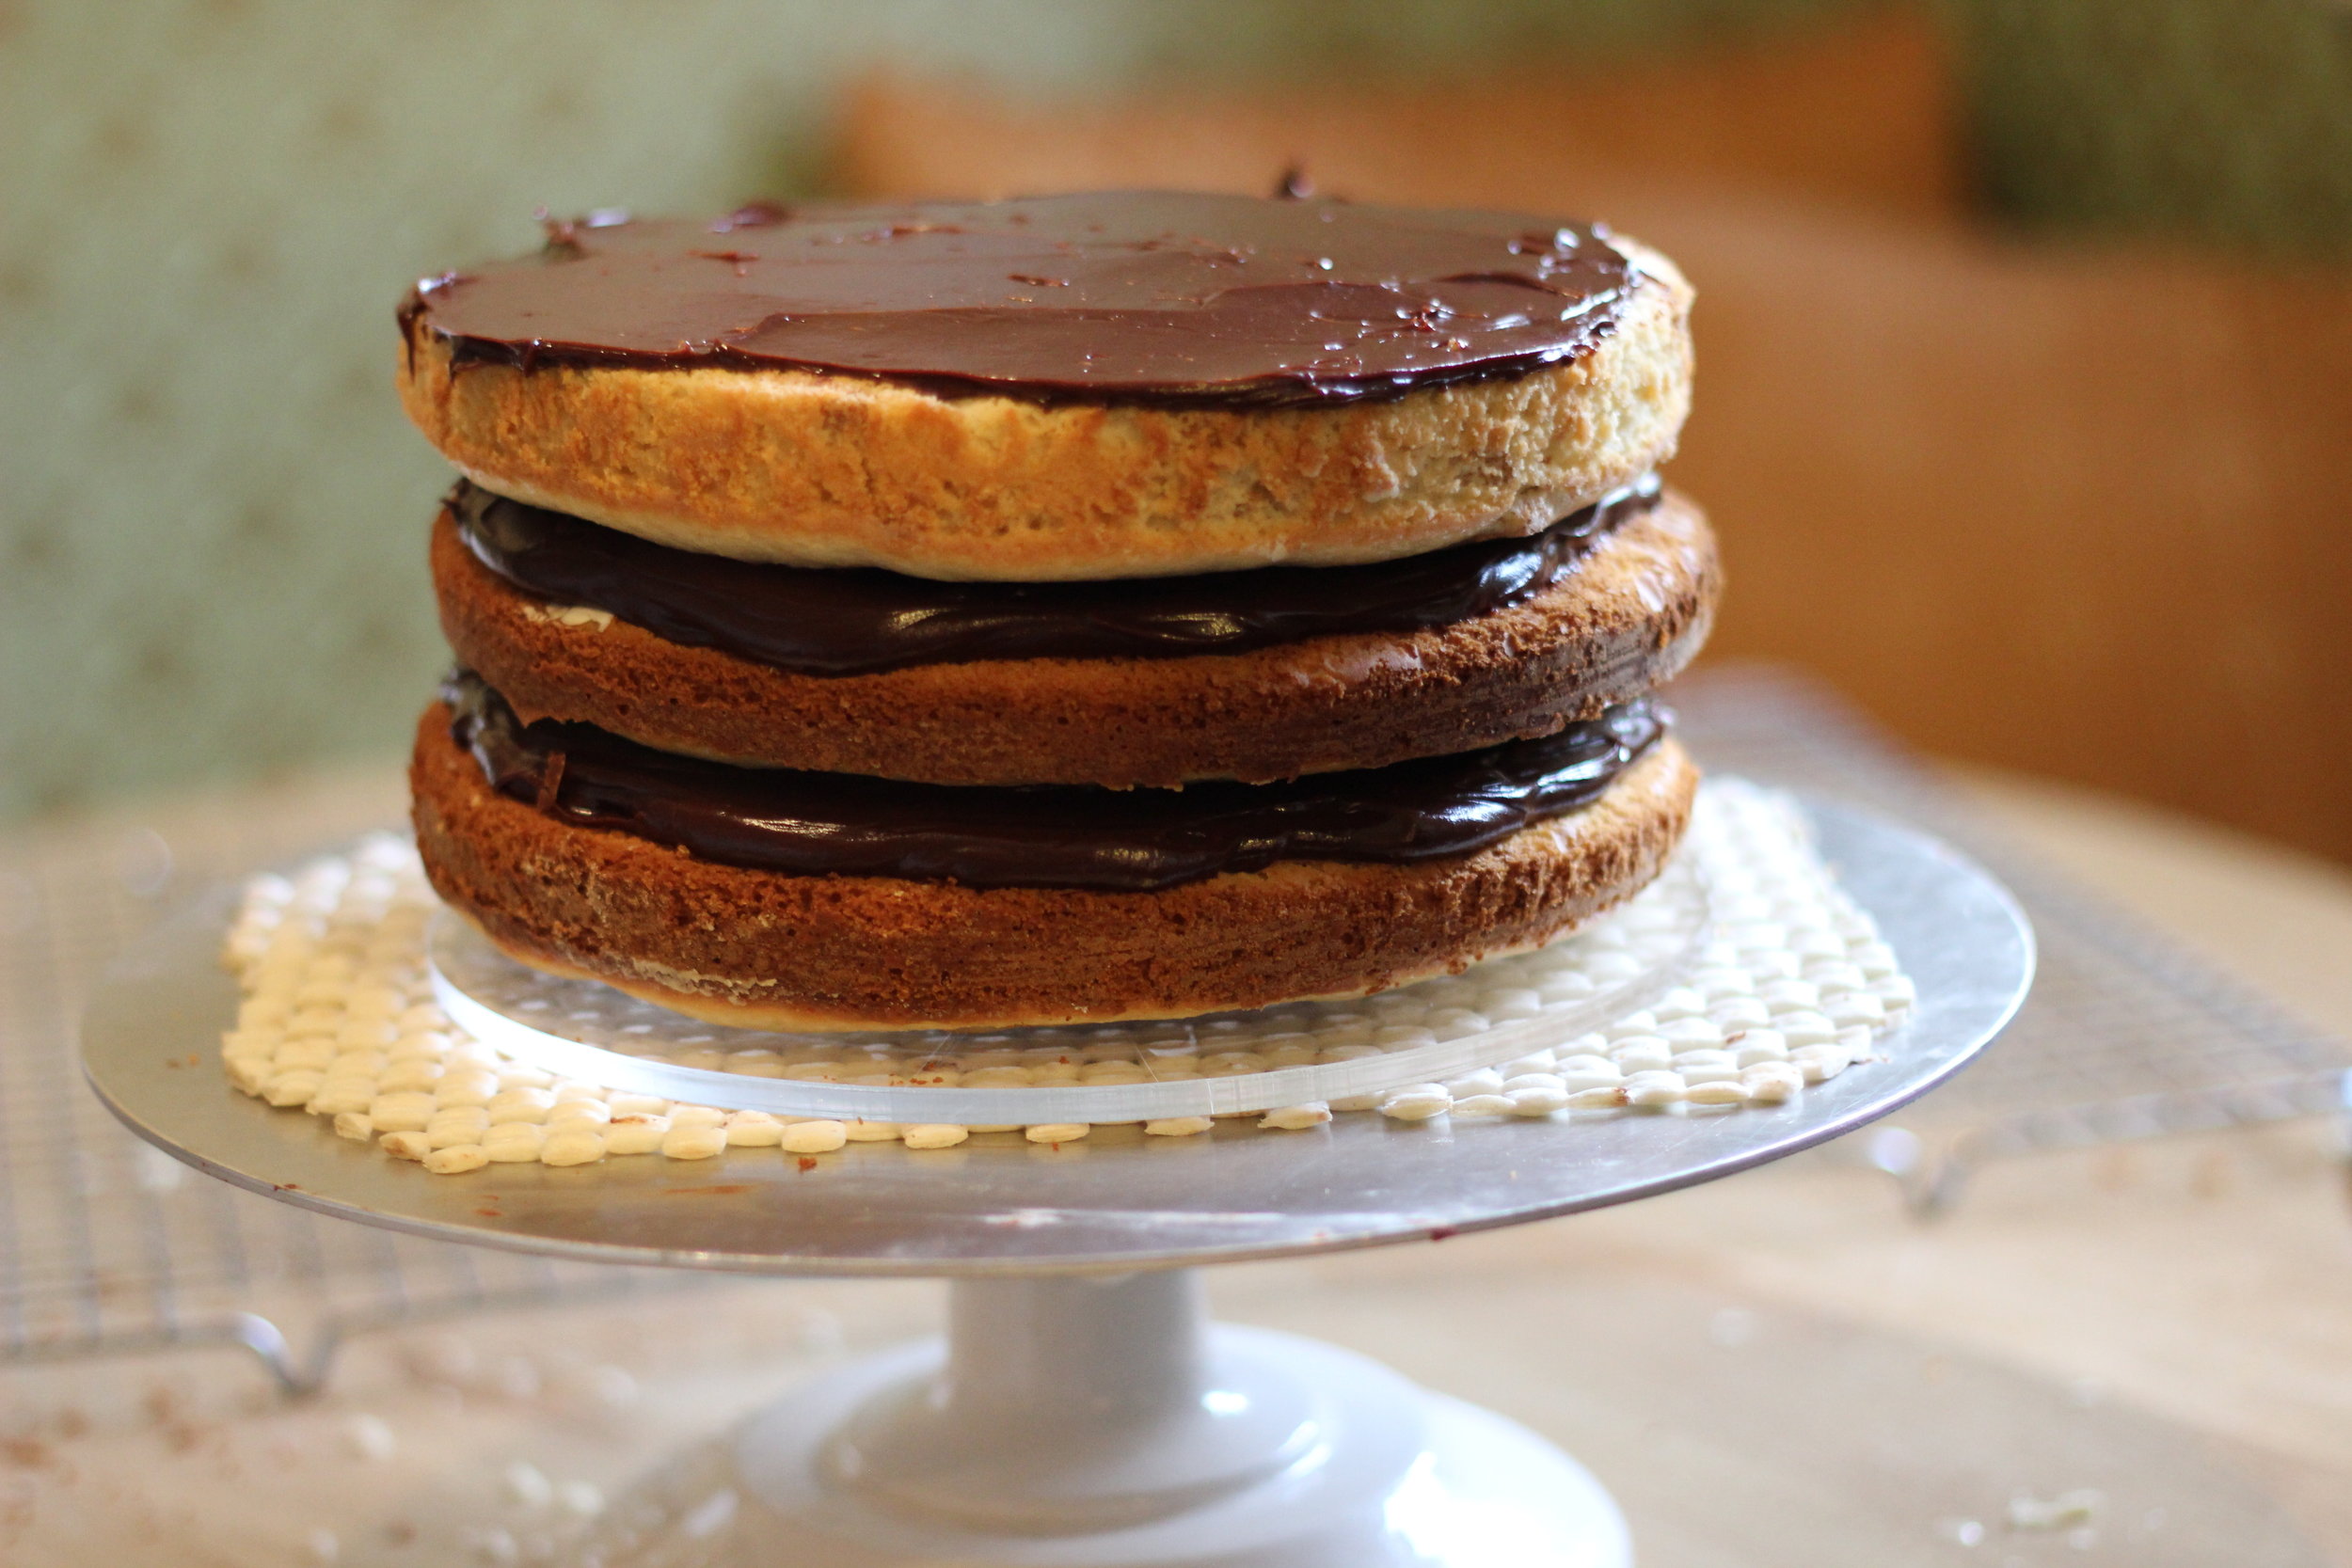
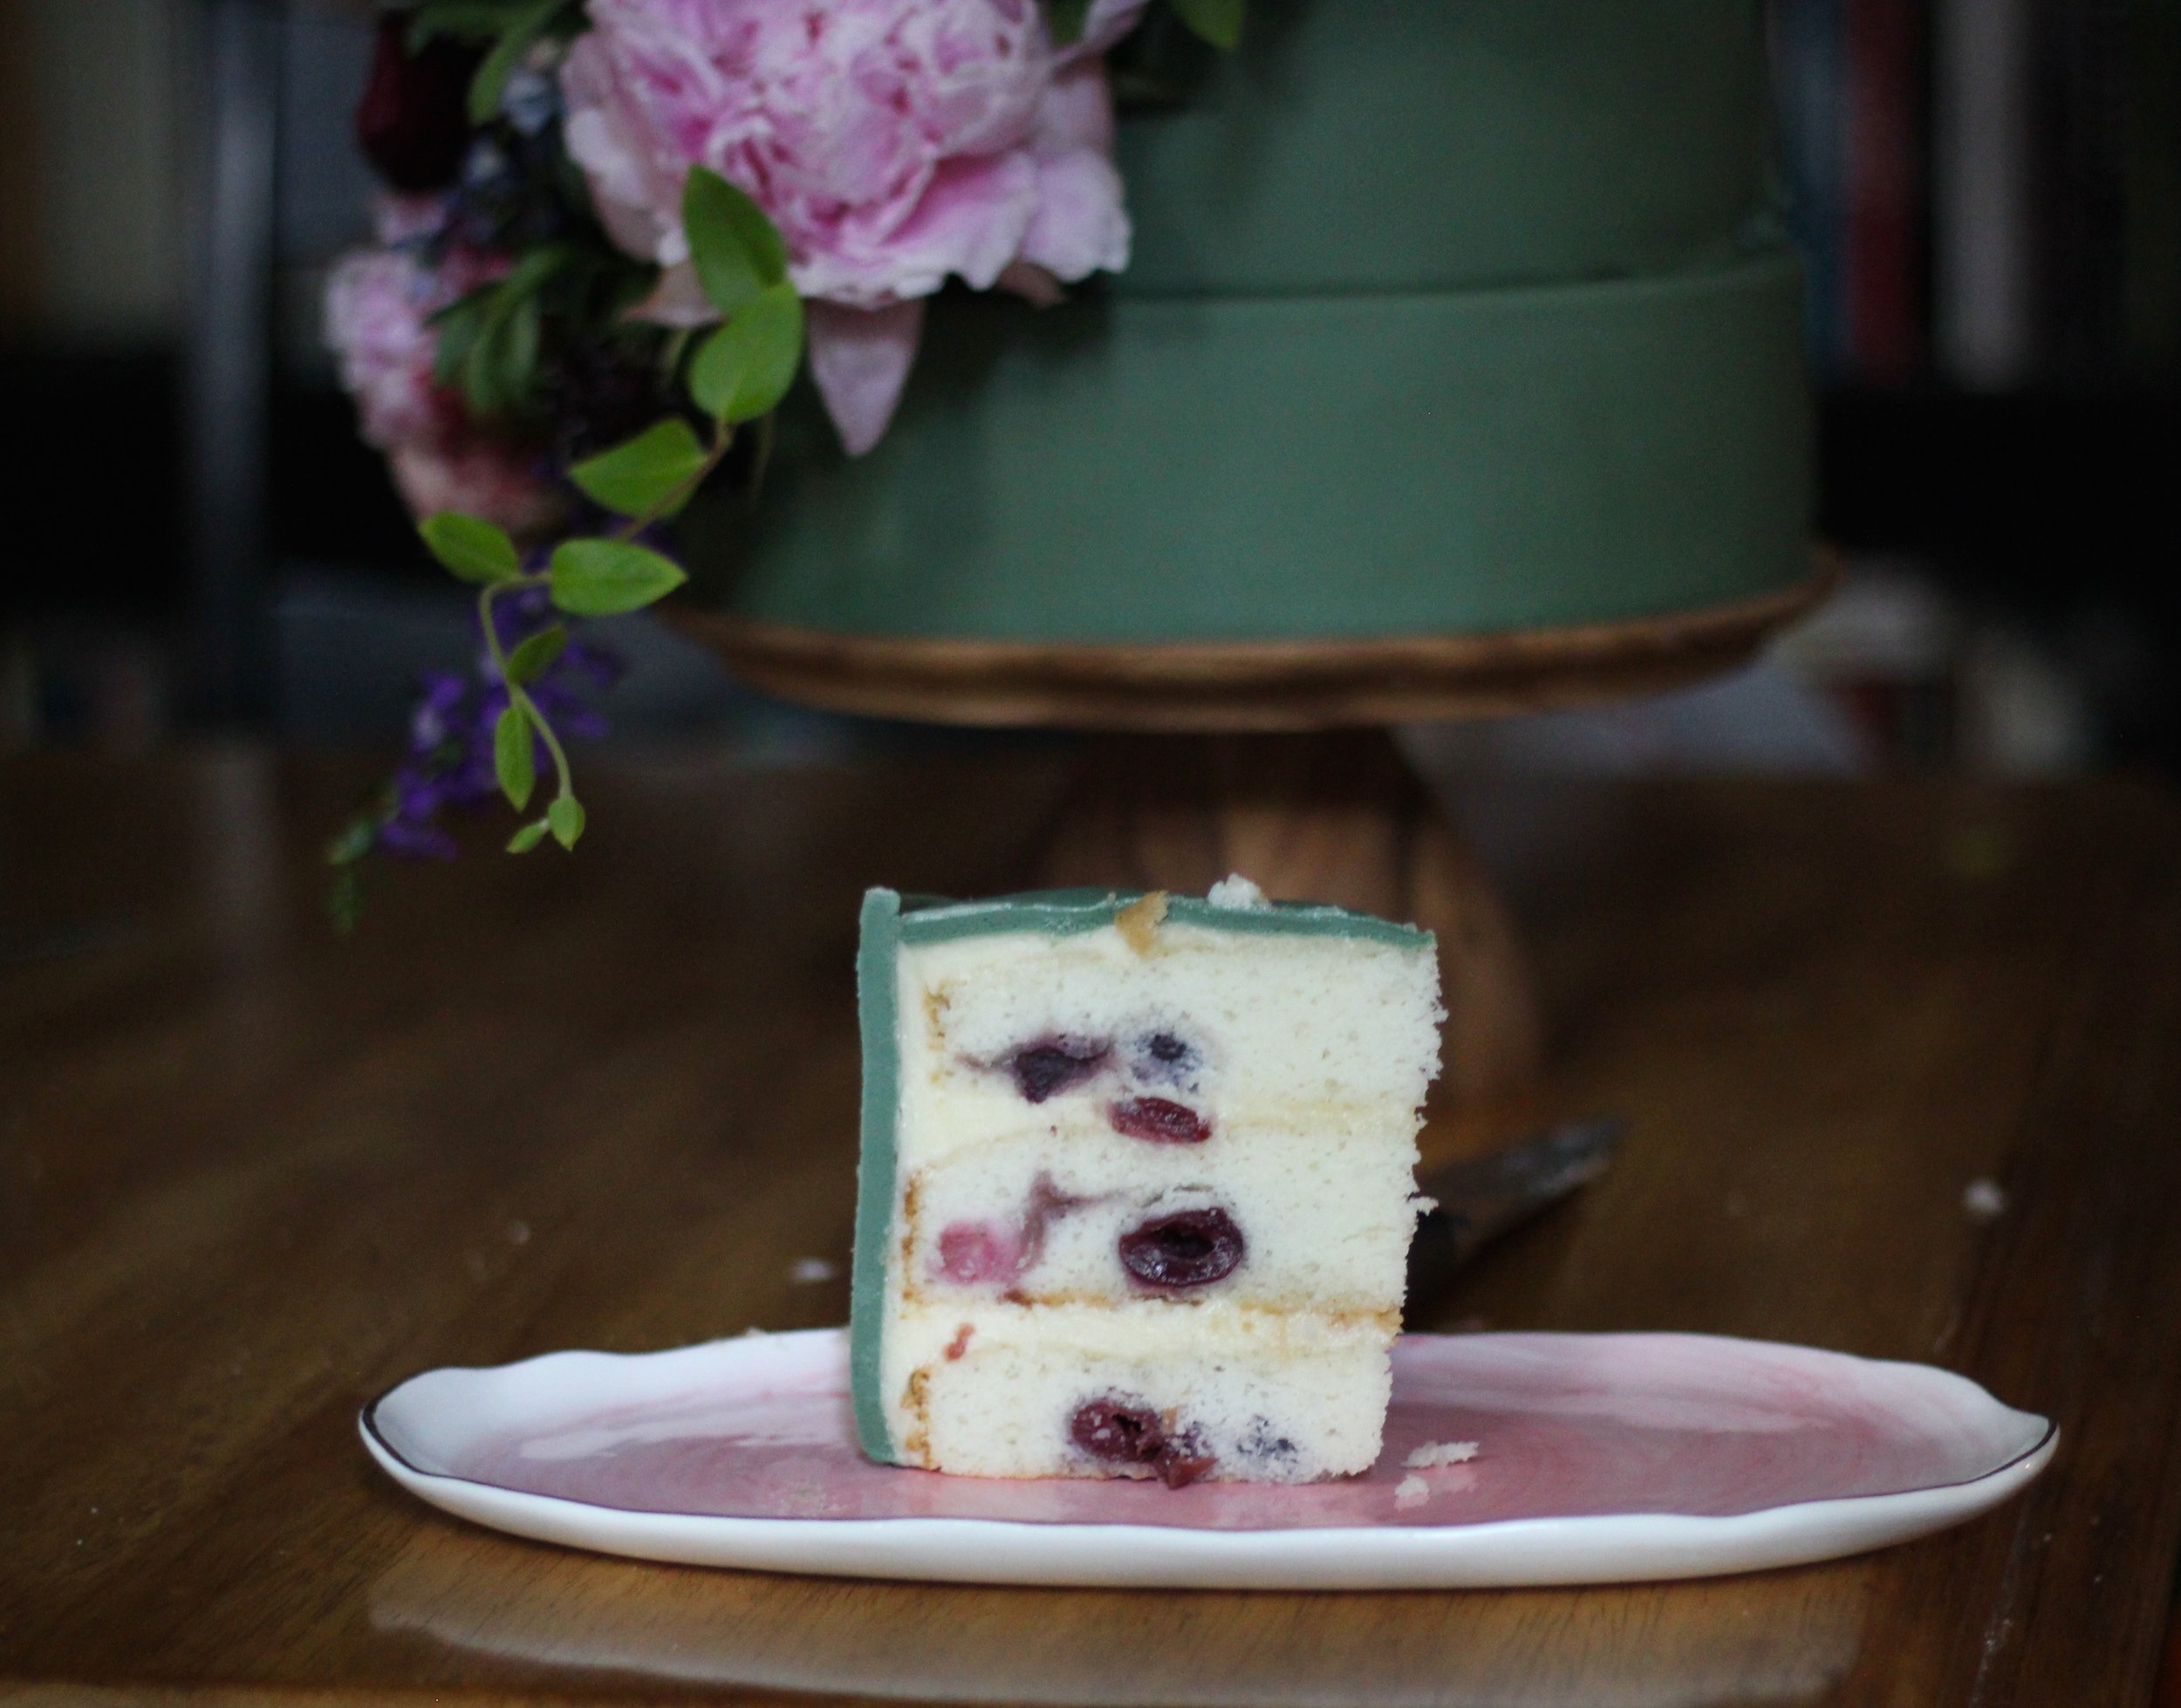
This cake is super moist thanks to both coconut milk and coconut cream, and the fresh cherries add and unexpected summery element that freshens up this classic cake. You can of course omit the cherries, or use another fruit if you'd like (fresh peach slices would be super good!).

these two guys are not the same--one is full of added sugar

these two guys are not the same--one is full of added sugar

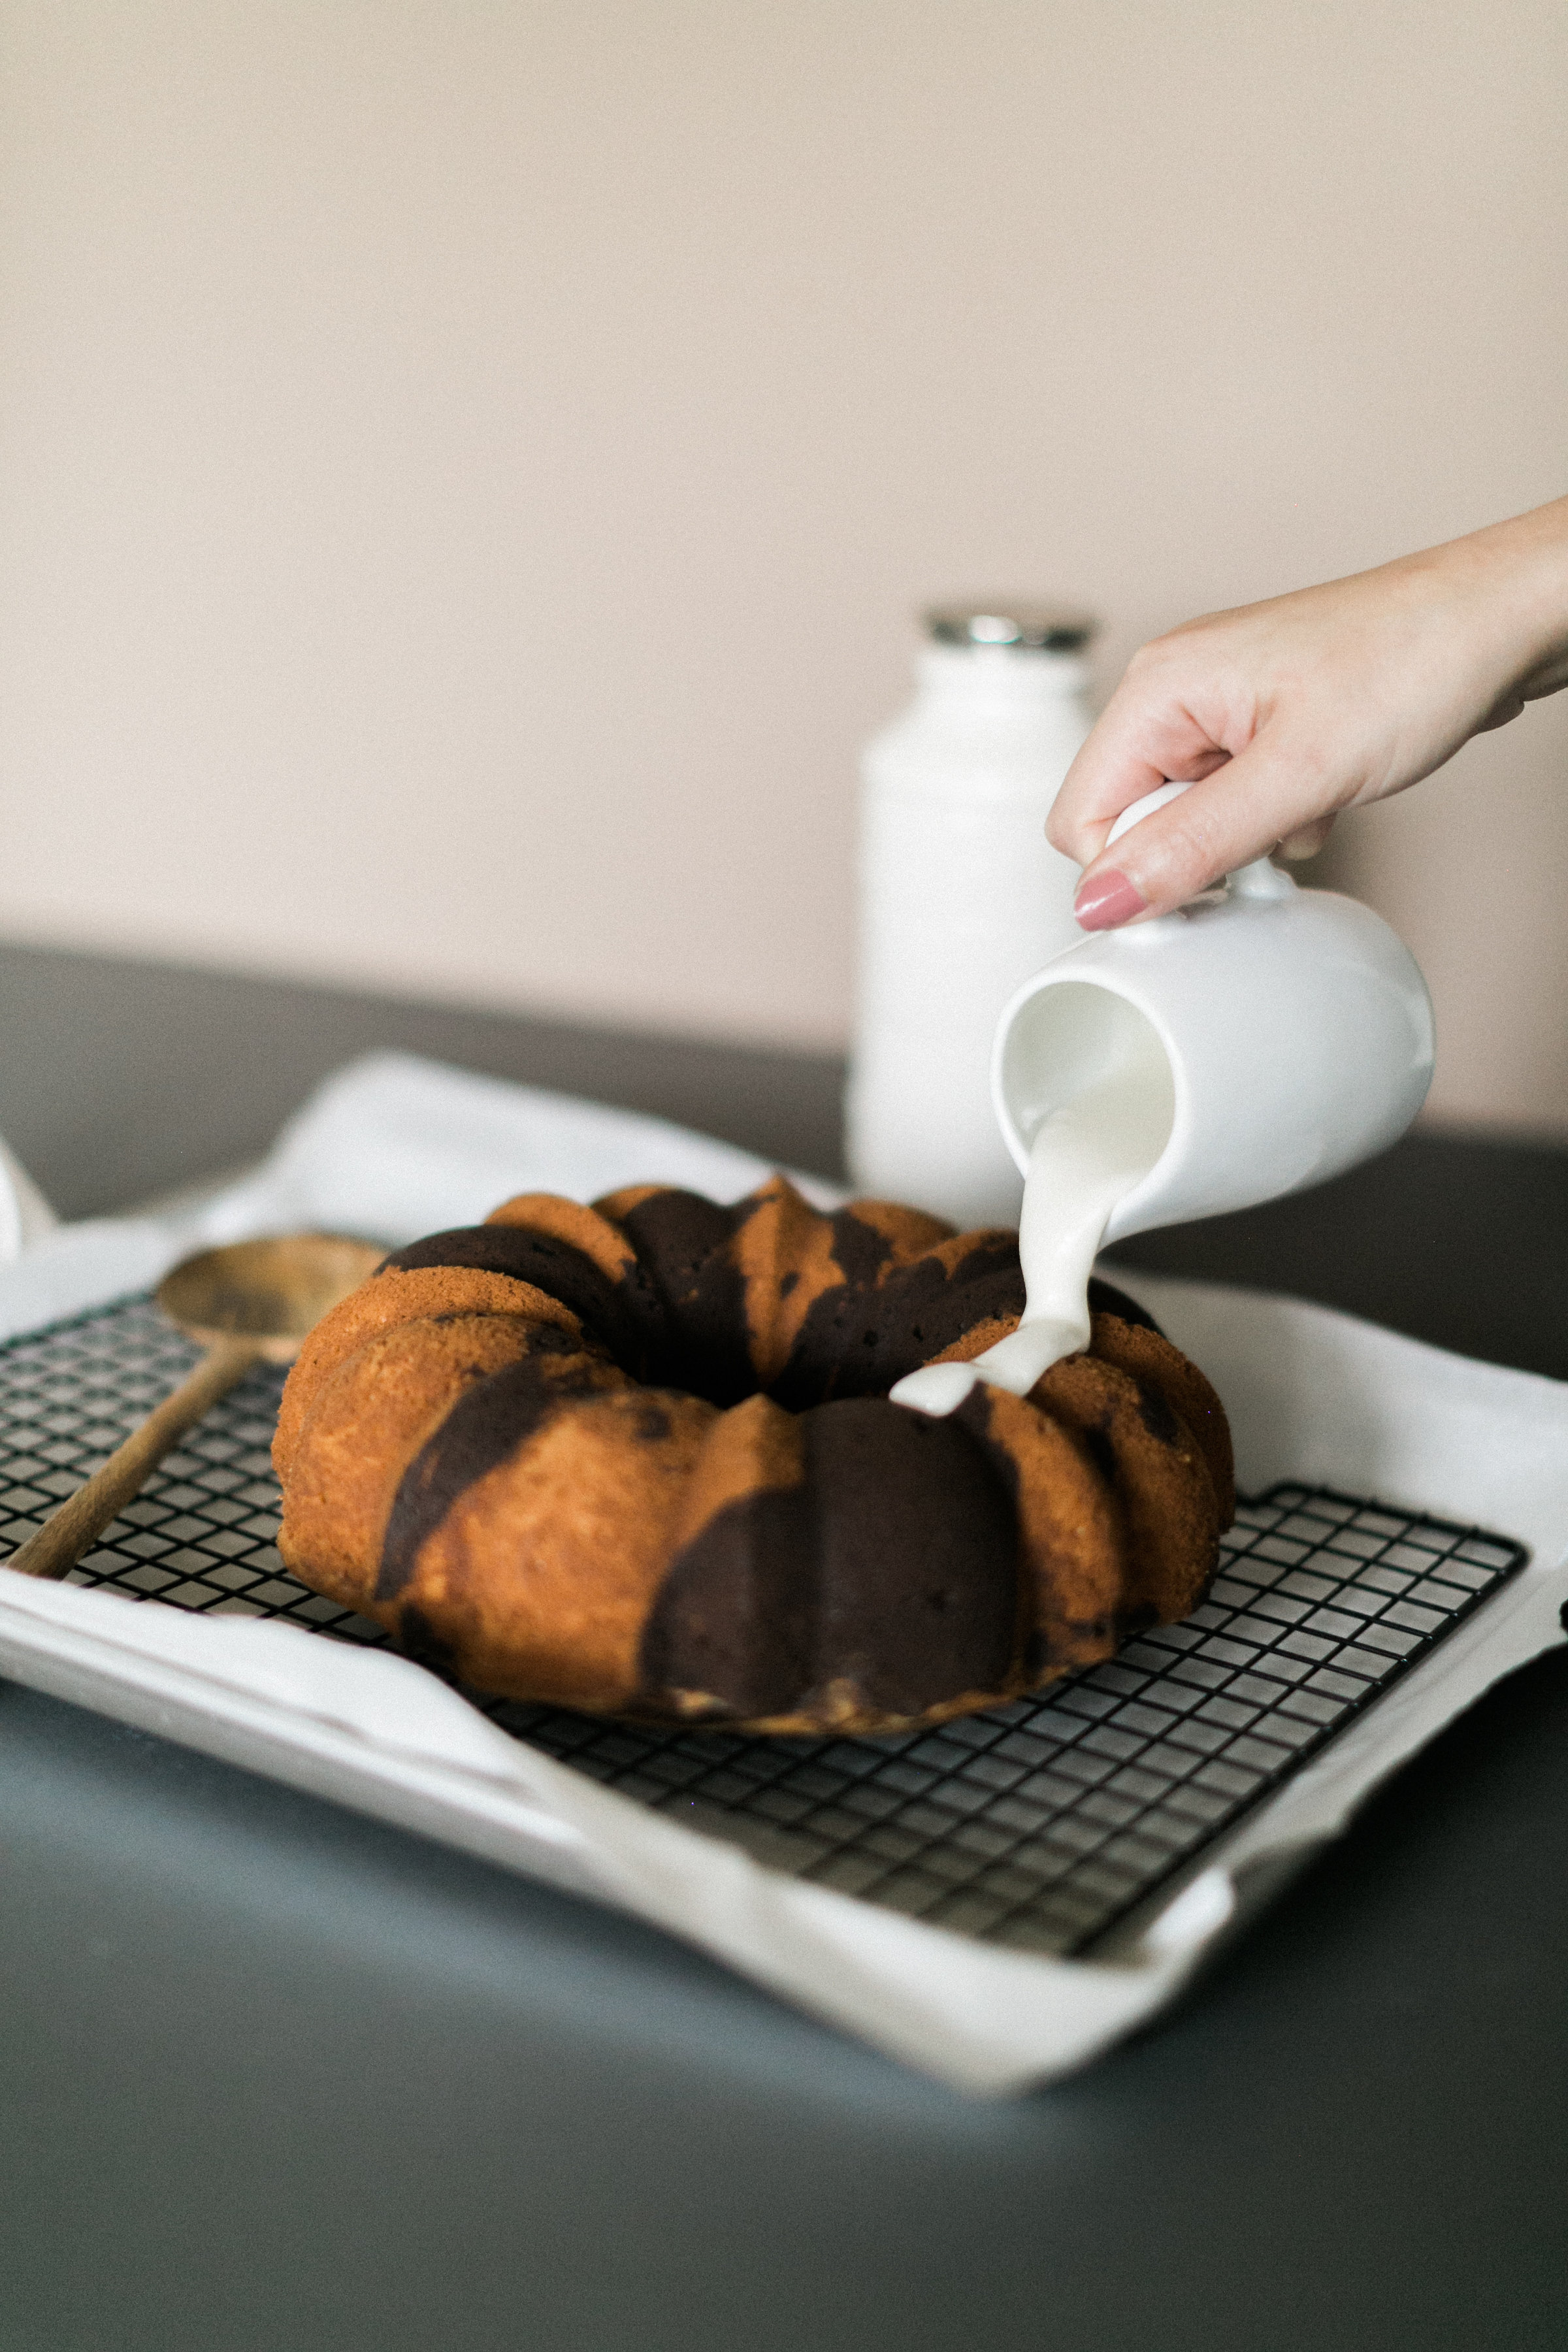
Cover it in this coconut buttercream and top with toasted coconut, or cover it in chocolate ganache. 

COCONUT BUTTERCREAM

7.5 oz coconut cream (1/2 of a 15 oz can, reserved from the cake recipe)

2 c. (4 sticks) unsalted butter, softened

2 c. (220 g.) powdered sugar

1 tsp. vanilla extract

1 tsp. coconut extract

1 tsp. kosher or sea salt

Combine all ingredients and whip until light and fluffy, at least 6 minutes.

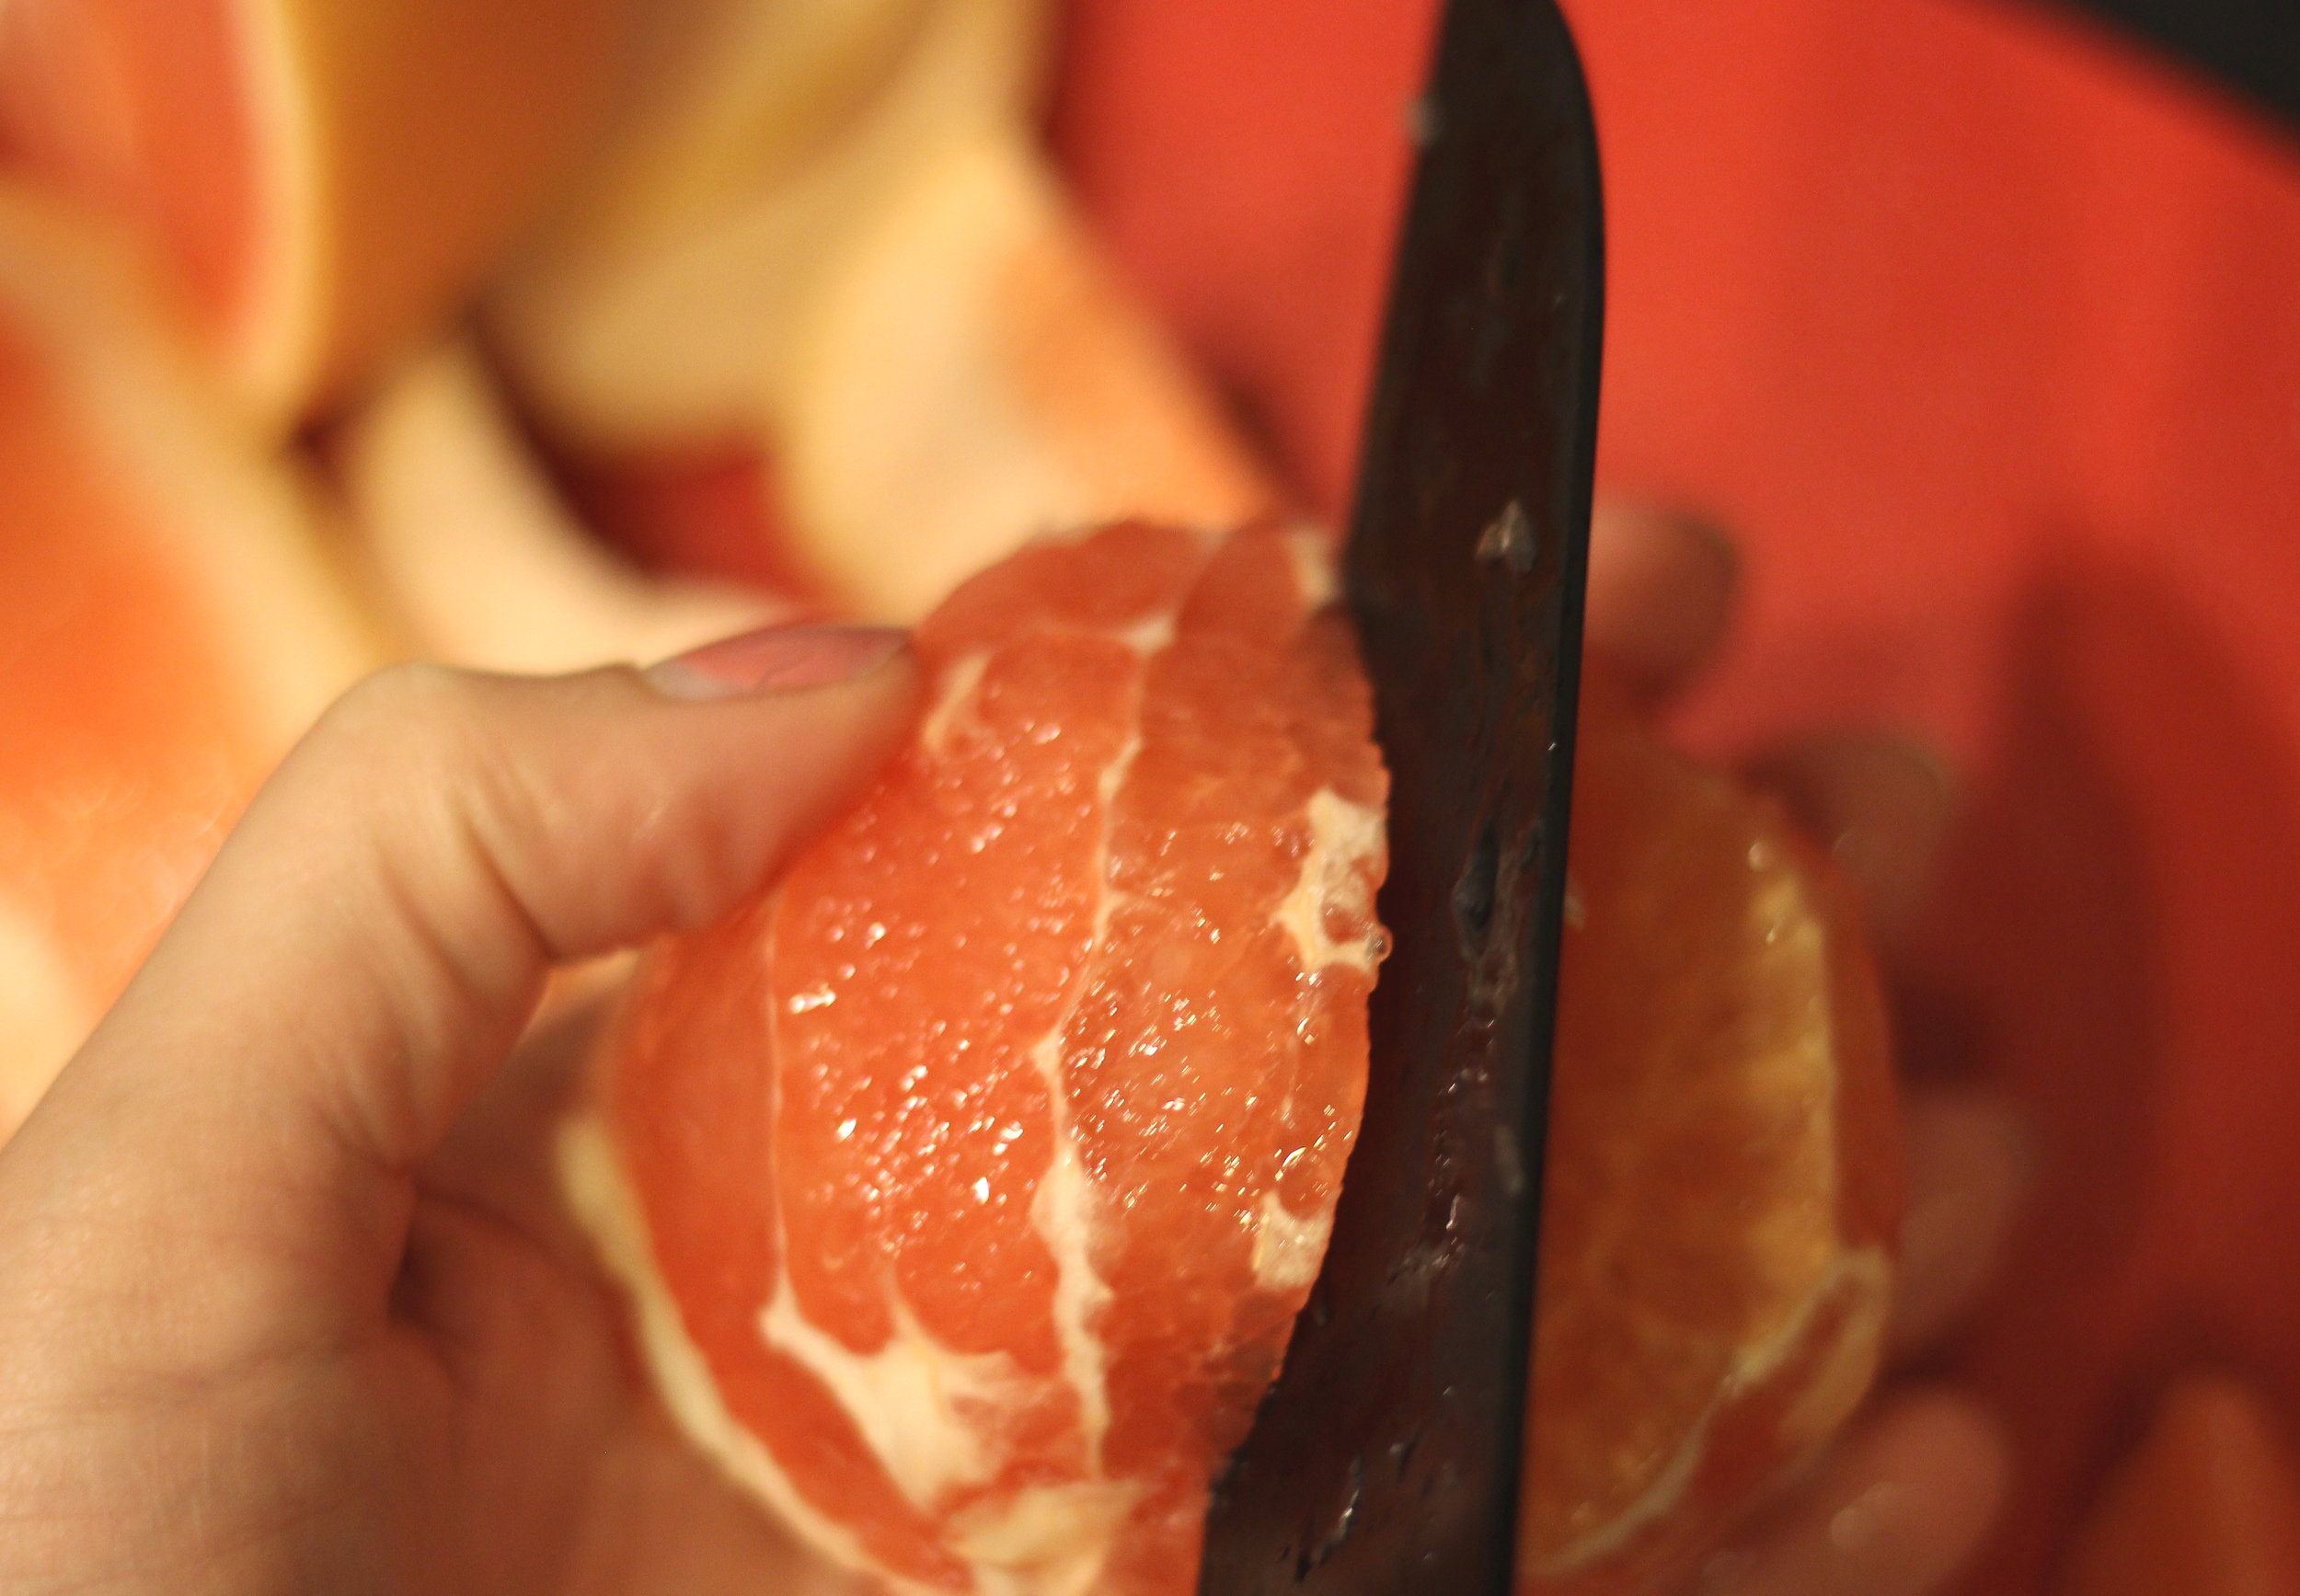
Now, when it comes to pitting cherries, there is one tool that stands head and shoulders above the rest. It's like a giant cherry stapler, and it is easy to clean, simple, and does the least amount of damage to your cherry with maximum efficiency. Step away from the damn paperclips and straws and paring knives and whatever foolish pitting nonsense you've tried before and buy yourself a new best pitter friend.

Now onto the recipe! Let me know what you think about this one!

CHERRY COCONUT CAKE

3 c. (350 g.) cake flour (I use White Lily)

3 tsp. (10 g.) baking powder

3 tsp. unsalted butter, softened

1/3 c. canola or vegetable oil

1 tsp. sea or kosher salt

2 c. (400 g.) sugar

4 large egg whites, room temperature

1/2 c. coconut milk

1/2 c. coconut cream

1 tsp. coconut extract

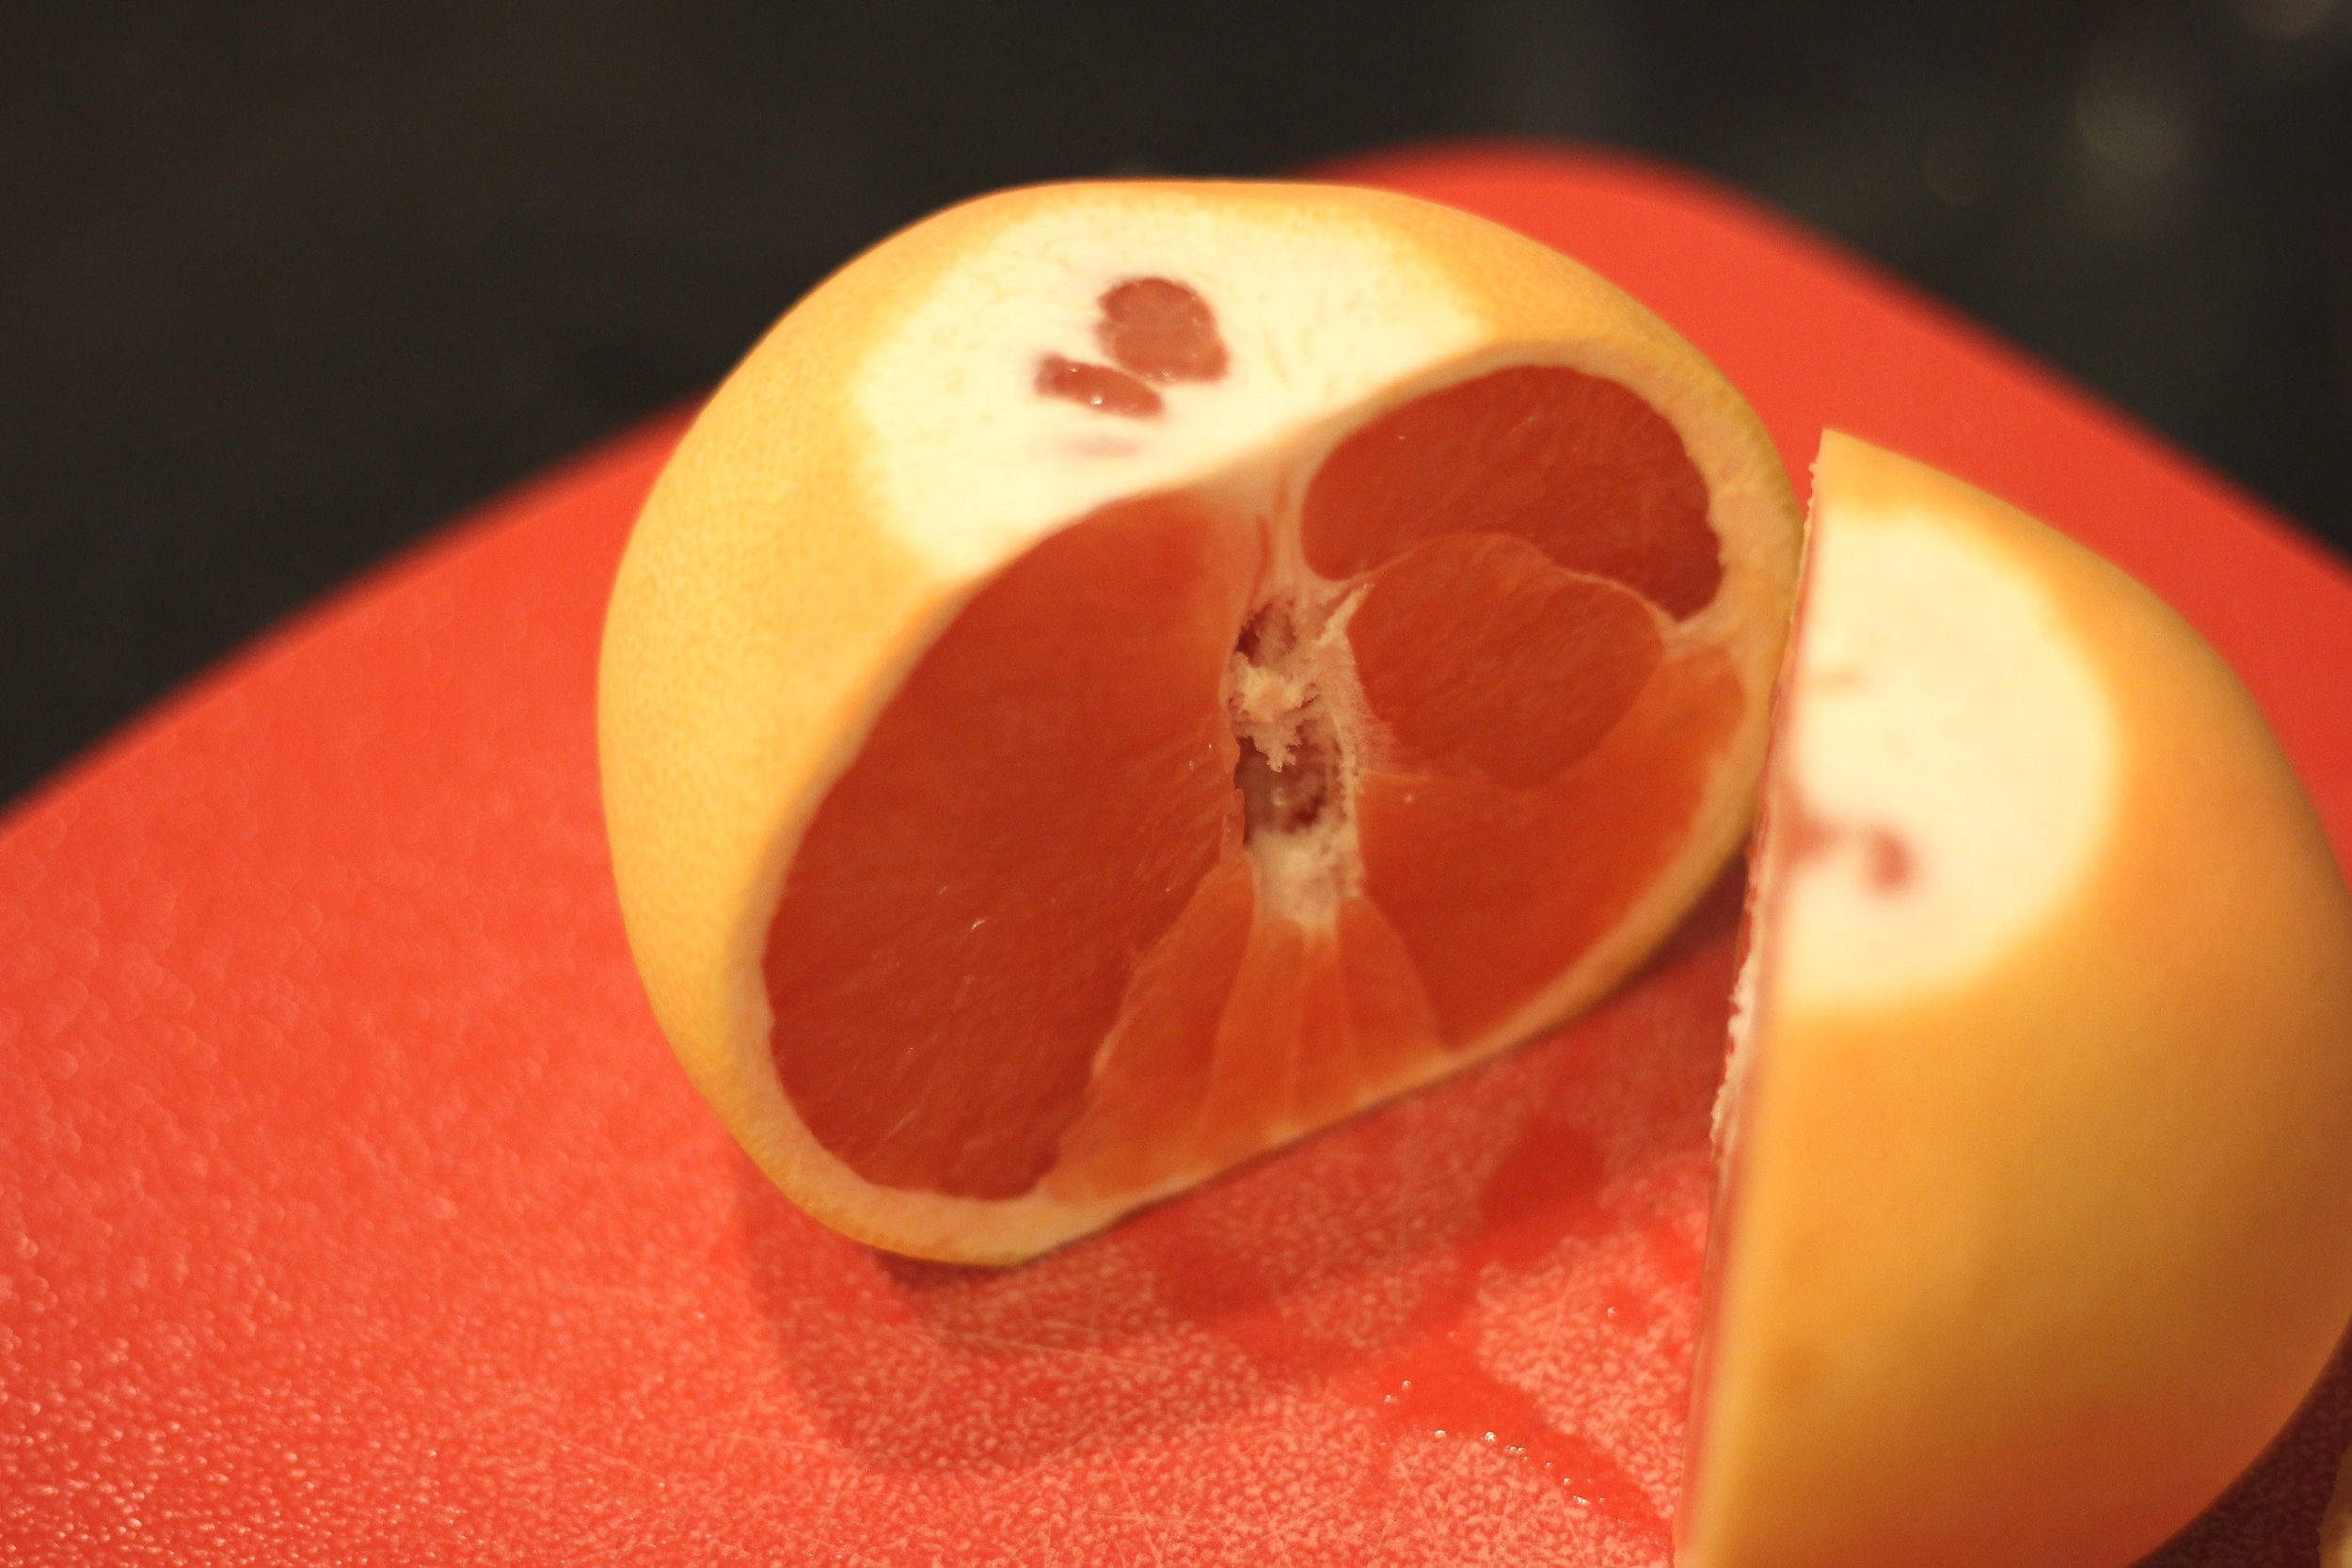
4 c. pitted fresh sweet cherries

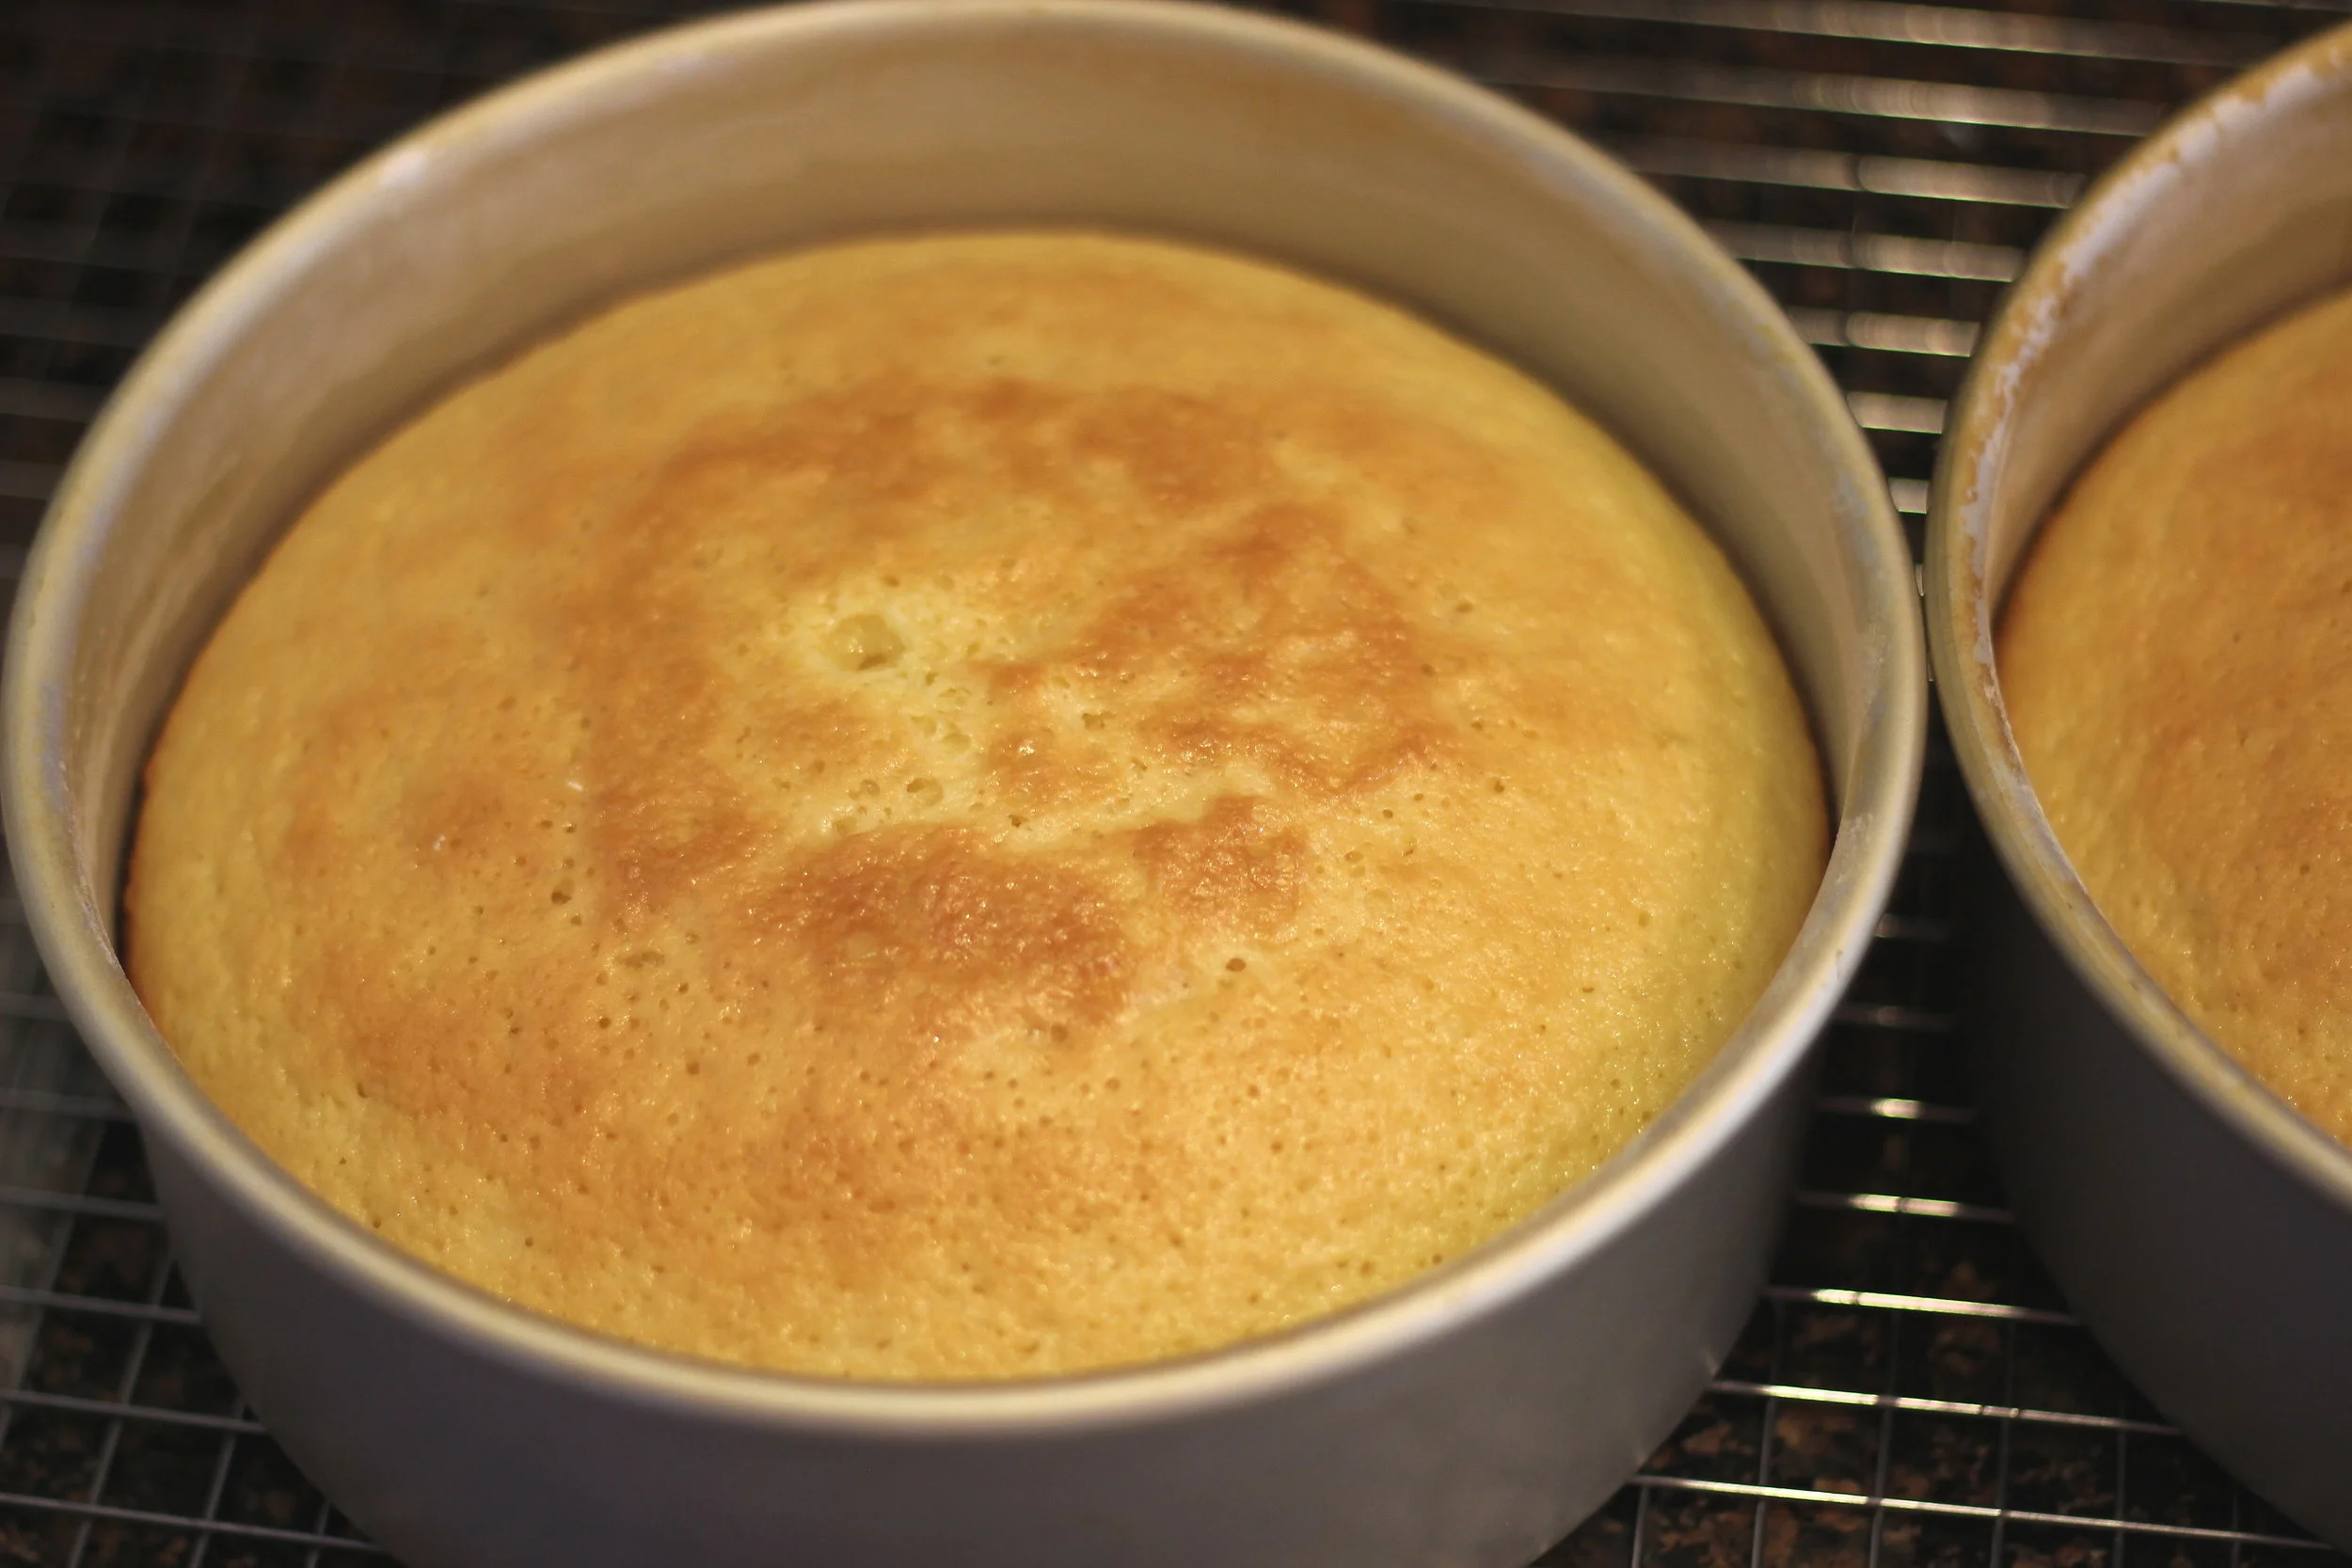
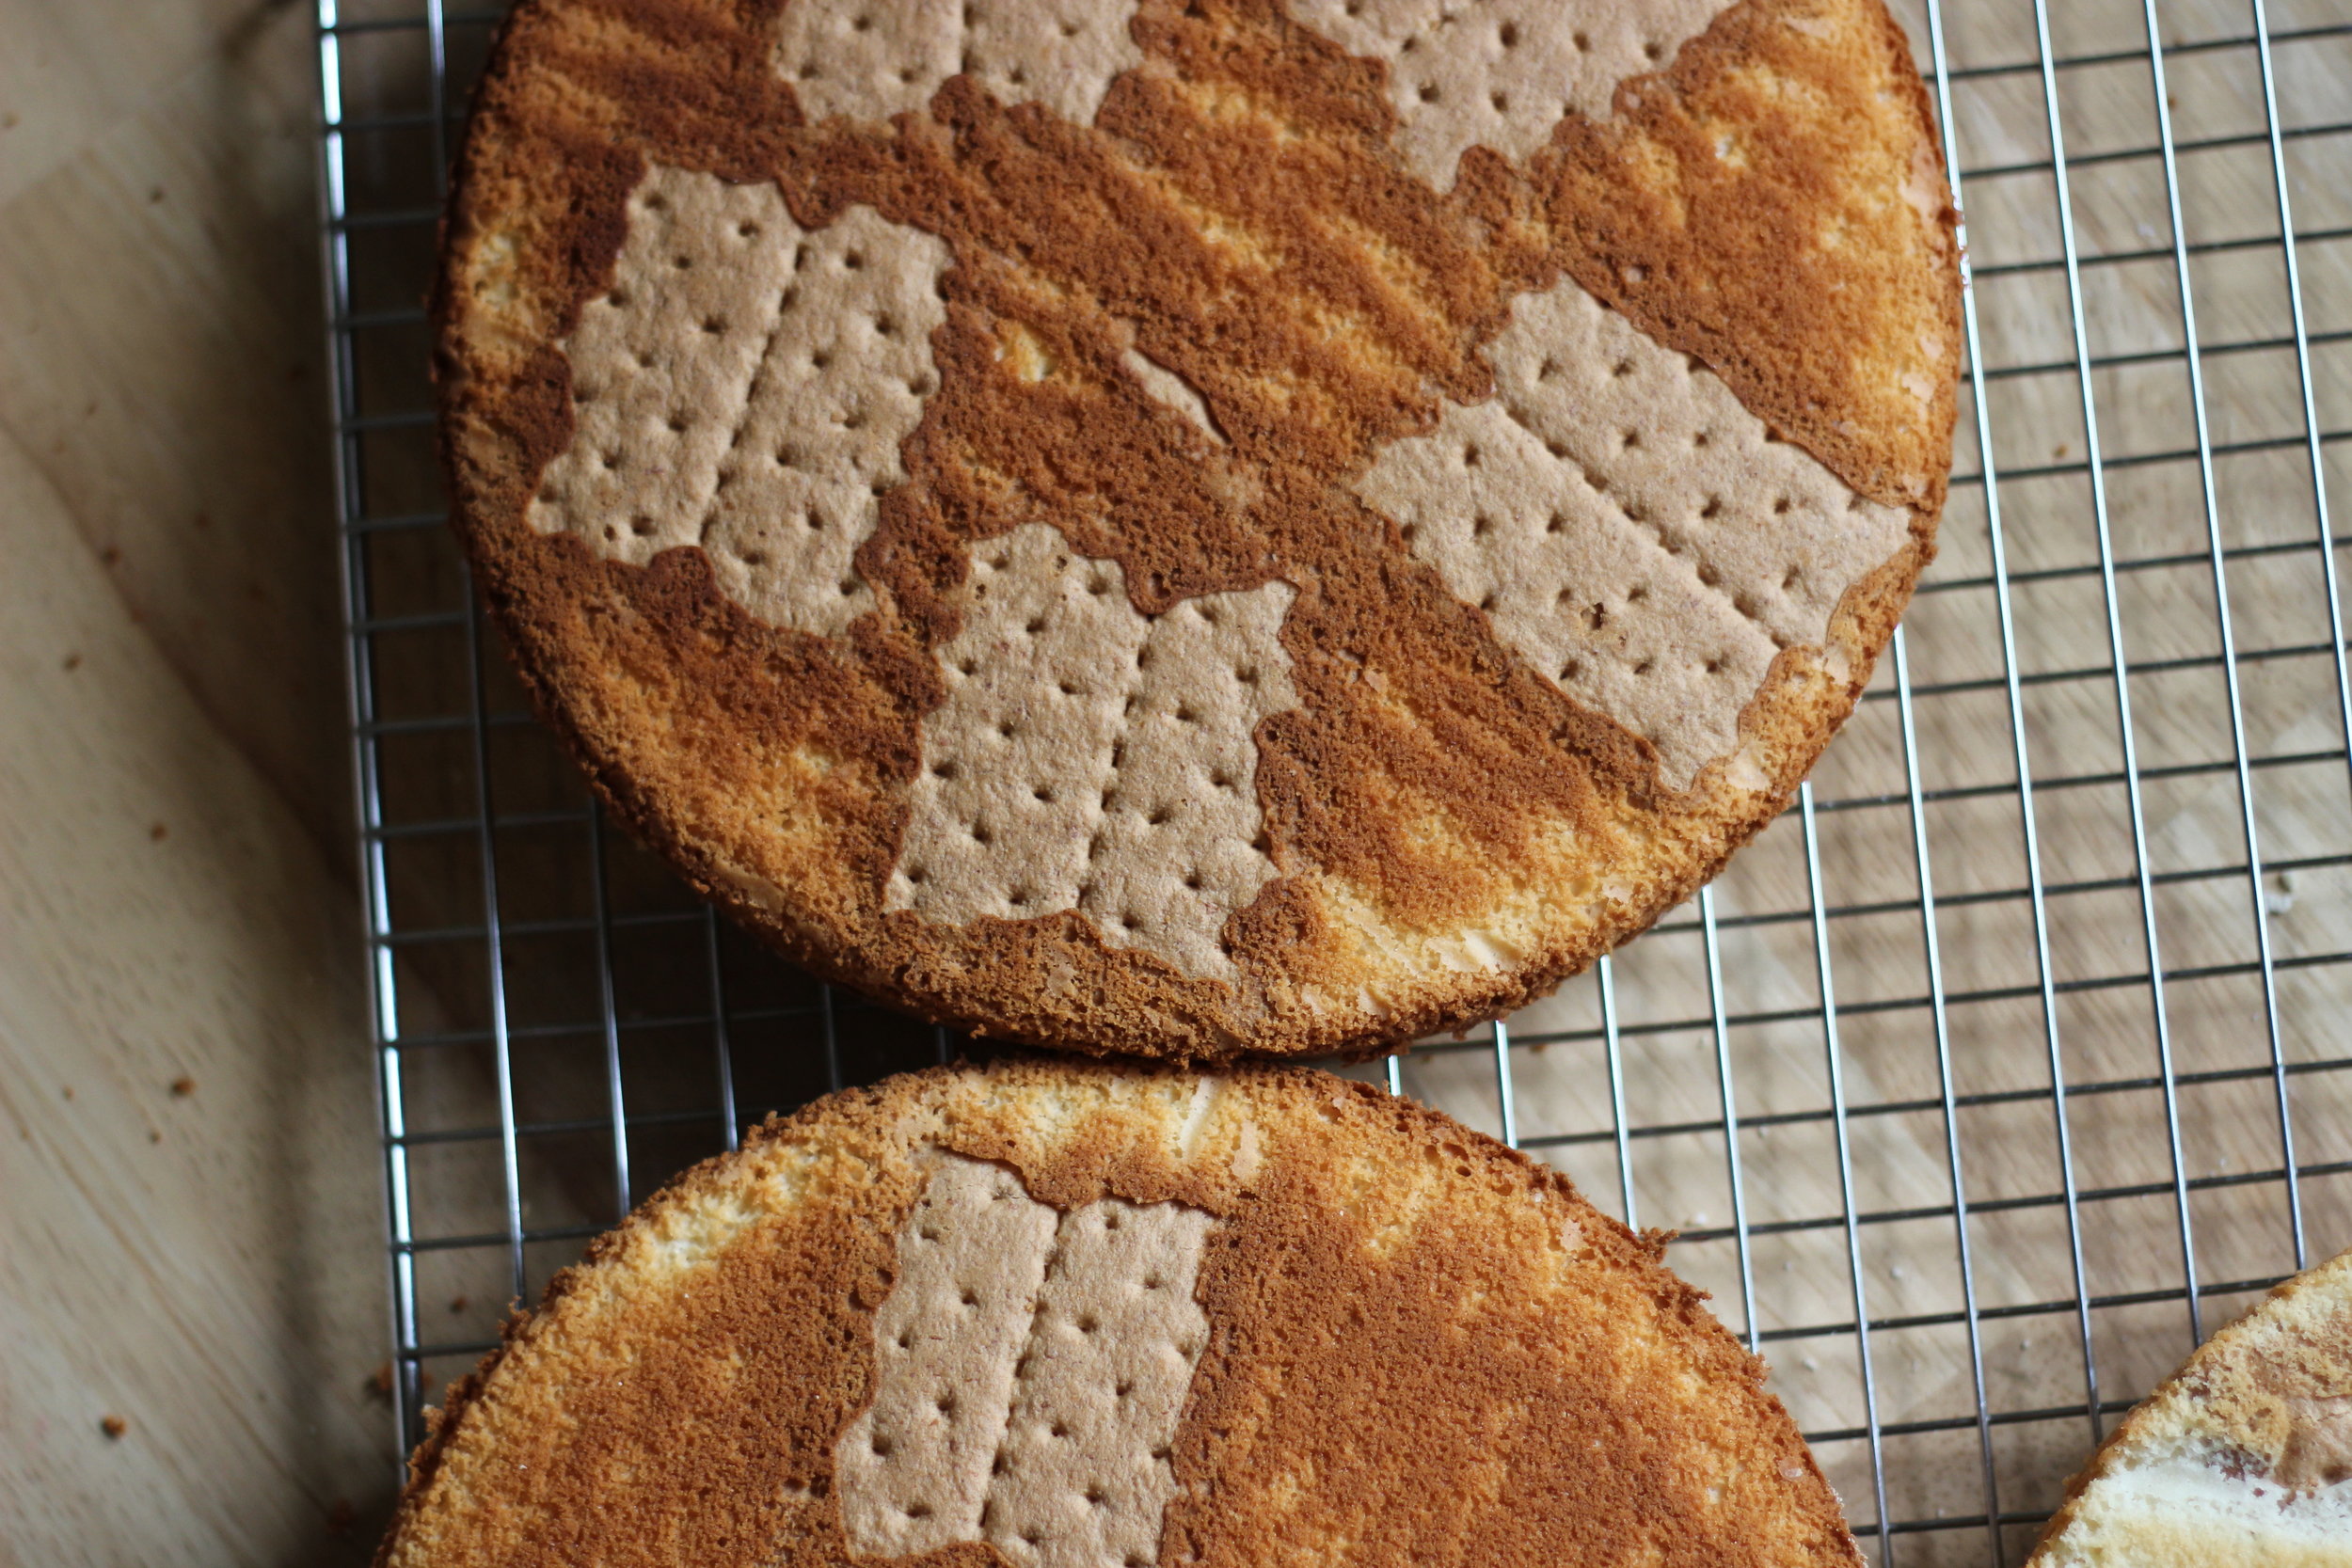
Preheat oven to 350 degrees F. Grease and flour three eight or nine inch round pans, and line bottoms with parchment paper. Add pitted cherries to the bottom of the pans, and try to keep the cherries away from the edges of the pan if possible (the cherries can stick to the edges and prevent the cake from rising properly).

Mix flour and baking soda together with a whisk until combined.

Place softened butter, oil, sugar and salt in a large bowl and mix on medium until combined (it will look like wet sand). Add egg whites and beat for three minutes. Add coconut milk, cream, and extract and beat until combined, then mix in dry ingredients until just combined. Divide among pans and bake for 25-35 minutes or until centers are set. Cool, fill, and frost. Top with toasted coconut if desired.

we had way too much fun 

we had way too much fun


Peach Brioche Danishes by Molly Brodak

Remember last year when the squirrels ate every single peach off of my peach tree? Well. Not this year. No sir. This year I wrapped my entire little peach tree in chicken wire. But these peaches were worth months of enduring this insane eyesore.

ugh lol

ugh lol

I ended up with maybe 16 or so peaches, not a lot, but I knew if I nipped off most of the peach buds the ones I would get would be bigger and better. And man, biting into one of these the instant it was picked was absolute heaven. Ripened for as long as possible on the branch and sun-warmed, the peach was smooth as heaven and so sweet, It was like I'd never really had a peach before.

I deliberated for a day or so before I could come up with a recipe for which I'd be willing to spend these precious peaches. Something time consuming and annoying: only the best will do for my babies.

Brioche! Brioche danishes! 

ooh ok!

ooh ok!

Don't get me wrong, I love the shatter of a flaky laminated-dough danish as much as anyone, but they are really dessert to me; a brioche danish is something I can actually eat for breakfast. The tender buttery dough is not too sweet, and like the best pie crust, is really the perfect foil for ripe summer fruit.

This recipe makes a substantial amount of brioche dough that you can bake in any way you'd like. I threw some of this dough into a brioche tin and had a few nice buns for dinner. I don't recommend halving this recipe, as a smaller amount of dough will not mix as well in your stand mixer.

On that point, please be aware you really do need a stand mixer for this operation. This dough is so soft it is basically a batter most of the time, so it just cannot be kneaded by hand. And I use an all-purpose flour because it makes an even more tender dough than bread flour, and since this is really a sweet treat and not sandwich bread, robust gluten formation is not that important to me in this recipe.

The small touch of cream cheese filling helps add some moisture to the pastry, and helps keep the peaches in place as the brioche puffs in the oven. I would recommend making these smaller than I made mine, shape them into maybe 2" rounds rather than the big ol' boys I made here. You can glaze them with a simple powdered sugar & milk icing drizzle or eat as is, both are lovely. Best reheated just for a couple of seconds in the microwave after the first day.

I messed with a few different brioche recipes to come up with my own version that I believe is perfect for danishes. It's a very tender brioche, not heavy nor dense. These look like heavy sinkers (where I come from we call any substantial carby, sugary pastry/pancake a 'sinker' for how it feels like a rock in your stomach and puts you to sleep) but they are surprisingly airy and feathery. 

So yes, this recipe takes forever and has a million steps. The best baking schedule here is to start the recipe in the afternoon or early evening, allowing for enough time for the first bulk fermentation, then allow to proof overnight, then you need a good 2.5 hours in the morning to shape and proof, then your pastries will be ready by late morning/early afternoon. Perfect for a brunch situation! You don't have to proof overnight, but you also don't have to eat amazing brioche, so look if you're going to go through this whole process why not allow yourself the most flavor development possible. It's a great weekend project to get lost in. And I promise you, all of your patience will pay off.

output_ZFTzfG.gif

PEACH BRIOCHE DANISH

makes about 20 danishes

1/2 c. heavy cream

1/4 c. warm water

3 1/2 tsp. (15 g) active dry yeast

4 c. (510 g) all-purpose flour

2 tsp. (14 g) fine sea salt

1/3 c. (75 g) sugar

5 eggs, room temperature

1 c. unsalted butter, soft, cut into chunks

Peeled and sliced fresh peaches

for the cream cheese filling:

1/2 pkg (4 oz) cream cheese, softened

1 egg

1/4 c. sugar

1 tsp. vanilla

pinch salt

for the egg wash:

1 egg, lightly beaten

1/4 c. heavy cream

Mix heavy cream with warm water in the bowl of your stand mixer. Add yeast and mix with a whisk until yeast is dissolved. Mix in sugar and 1/2 c. of flour to make a slurry. Dump all of the rest of the flour on top of the slurry, do NOT mix together. Add salt on the top of the flour. Let the bowl sit, undisturbed, for about 30 minutes or until the flour shows cracks across the top. 

Using the dough hook, mix flour together with slurry, then add eggs and beat on low for 3-5 minutes until incorporated. Add softened butter in three stages, waiting for each addition to fully incorporate before adding more. Mix on medium low for 20 to 25 minutes, checking the dough towards the end to see if the dough is stretchy and smooth (don't worry about the windowpane test). The dough may cling to the hook and slap against the bowl--it is done if so. 

Spray a bowl and some cling wrap with cooking spray and transfer to bowl, turning to oil the dough ball. Cover with the plastic wrap and leave in a draft-free spot for two hours or until doubled.

Punch down by folding in each 'corner' of the dough ball then flip over so the gathered seam is down. Replace plastic wrap and refrigerate overnight.

8-12 hours later, remove dough and cut into equal 1 to 2 oz. portions, roll into logs then twist into bun shapes. Place buns on parchment or silpat lined cookie sheet and cover with oiled plastic wrap. Place in draft-free spot for two hours or until doubled.

Preheat oven to 375 degrees F. Mix egg with heavy cream for egg wash and brush over danishes. Prepare cream cheese filling by mixing together softened cream cheese, egg, sugar, salt, and vanilla. Press an indentation in your danishes and fill with mixture. Add slices of peeled peaches, as many as will fit, or other fruit if you prefer.

Bake for 25-45 minutes until golden brown. Serve warm if at all possible. Ice when cool if desired and store in an air-tight container.

Grilled Grapefruit & Brown Sugar Cake by Molly Brodak

Do you have a cake hater in your life? Maybe you are a cake hater, although it seems unlikely if you are reading my blog that you are a cake hater. Anyway, here's what you do: invite your cake hater over for a dinner party soon and make this cake for dessert.

I actually get where cake haters are coming from. So much cake is...so bad. It's just too sweet, isn't it, just a mouthful of dull sugar and nothing more, with no appealing additions other than even-sweeter frosting (ugh) or maybe some fruit (great, more sugar). I remember going to weddings as a kiddo and thinking that wedding cake was the worst cake of them all, being the whitest, dullest, sweetest mess I'd ever tasted, thinking it must be shitty on purpose for some reason. I wasn't completely wrong to surmise that all of the adults sucking down beer and wine with their cake maybe were onto something.

So this is the most anti-wedding cake you could have, short of it becoming chocolate. It's super tangy, with almost a hint of interesting bitterness, like burnt sugar has. The brown sugar balances the bright citrus flavor so perfectly; I think it is one of the tastiest cakes I've ever made. It's moist and rich thanks to the fats from the oil and sour cream, but super fresh and tangy due to the 3-way grapefruit additions, the best of which is the smoky, caramelized, slightly bitter grilled grapefruit bits that stud the cake like tiny jewels. 

Speaking of weddings, my first order of business after getting married last week has been finding ways of getting just a touch more use out of my wedding dress, hence the tulle background--that's her.

And look at those pretty tasting forks my friend Caroline gave me! Eeep!

Little pink spray roses are my favorite roses, and pastel blue is my favorite blue, so I made a kind of second wedding cake for myself with this one. I just happened to have this sugar paste rose wreath left over from a previous project and it turned out to fit so well on this cake.

hiiii

hiiii

Now, onto baking. The first thing you need to do here is prepare your grapefruit. You are going to use all of one large grapefruit for this recipe, extracting as much grapefruity flavor as possible from one fruit. Of course, first we zest it, making sure, as always, to not zest too deeply, as the white pith under the skin is very bitter. For baking, zest citrus is light, short strokes so you end up with small pieces and not long creepy strings of zest.

Then, we're going to remove the fruit from half of the grapefruit (the other half will be juiced). This method is the best way of getting lovely citrus fruit segments for salads. I remember learning how to do this in a knife skills class I took years ago and besides learning how to break down a chicken, it was my favorite knife skill I learned there.

Just cut the top and bottom off to make a stable surface, then slice away the skin and rind, following the curve of the fruit, and trying your best to remove all the pith but as little fruit as possible. Then, just cut out the wedges with your paring knife. Grill for about two minutes on each side, just until they are browned but not burnt. They will break apart as you move them, which is fine. Remove bits from the pan and toss with a teaspoon of brown sugar and allow to cool. It won't seem like very much fruit but don't worry, it's the perfect amount.

And yes, you need a full teaspoon of salt, since as you know salt is the guy, not sugar, who counteracts excess bitterness best. Science! This recipe makes a small cake, just two 8" layers, so it can be easily doubled if you want a bigger cake. Which you do.

GRILLED GRAPEFRUIT & BROWN SUGAR CAKE

1 3/4 c. (201 g.) cake flour (White Lily)

1 3/4 tsp. (8 g.) aluminum-free baking powder

1  c. (226 g.) brown sugar & 1 tsp, divided

1/2 c. (113 g.) white sugar

1/3 c. freshly squeezed grapefruit juice

1 tsp. fine sea salt or kosher salt

2 large eggs, room temperature

1/2 c. canola or vegetable oil

1/3 c. sour cream

1 tsp. vanilla extract or 1/2 vanilla bean, scraped

Zest of one grapefruit

Grilled grapefruit segments from 1/2 of a grapefruit (see below)

Whisk flour and baking powder together thoroughly in a small bowl and set aside.  

Zest grapefruit into a large bowl. Cut grapefruit in half lengthwise (from top to bottom) and juice one half for 1/3 cup of grapefruit juice (if it doesn't make a full 1/3 cup, add water to complete it). Cut off rind from the other half as shown above and remove fruit segments with paring knife. Grill segments in a cast iron grill pan lightly brushed with butter for a few minutes on each side until lightly browned. Remove from pan and toss in 1 tsp. of brown sugar and set in fridge to cool for at least 30 minutes.

Preheat oven to 350 degrees F. Grease and flour two 8" pans and line bottoms with parchment.

Place sugar, salt, and grapefruit juice in a small saucepan and heat until sugar is mostly melted--do not allow to boil. Pour sugar mixture into a large bowl with zest. Add oil, vanilla, sour cream, and beat until smooth, about 2 minutes. If mixture is still hot, allow to cool for a few minutes before moving to the next step.

Add 1/3 of the flour mixture and beat until smooth and lump-free. Repeat with the remaining 2/3rds, scraping the bottom of the bowl and making sure no flour lumps remain. Mix in eggs on low speed, one at a time, until fully combined. Fold in grapefruit bits with a spatula.

Divide batter between pans and tap on the counter to remove large air bubbles. Bake for 20 minutes or so until centers are fully set and spring back when pressed. Allow to cool for 10 minutes, then invert cakes onto cooling rack. Level cakes by slicing off their crown. Allow cakes to cool and rest, then fill, and frost.

so perfect! 

so perfect!


Mandarin Matcha Cookies by Molly Brodak

matcha10.JPG

One of my favorite books when I was little was the Runaway Bunny. It's a little sad and creepy now when I look at it again, as the best children's books always are, and it reminds me so much of my mom. I used this book as inspiration for these Mother's Day cookies on sale now here in Atlanta at Youngblood Boutique.

I also am a huge fan of Japanese ceramics, and I think the poppy seeds in this cookie remind me of the subtle textures and imperfection of some Japanese tea cups and plates, the wabi sabi kind, a little imperfect to remind us of our own imperfect, impermanent existence.

The farmer's market had some lovely mandarins on sale last week, and I thought their flavor would brighten up this matcha cookie I'd been working on for a while. I originally had a matcha ginger flavor, but I much prefer this mandarin version. It's sweeter and friendlier.

I tested this recipe with a regular/low quality green tea powder and a really nice, expensive one from the Asian grocery, and there was a big difference in taste. The low quality matcha made the cookies, well, green, but not very flavorful. The expensive stuff had a beautiful bright, almost neon green color and really tasted like the real deal, so take that info and do what you will with it.

Here's how I do my rolling out--it's a method that causes minimal stress/sticking and less distortion of your cut shapes. Overall the plan here is to just keep the dough on wax or parchment paper (wax is better since it wrinkles less in the freezer) and keep it cold. Not rolling out directly on your work surface also reduces the amount of flour you'll need to roll out, since it is ok that the dough sticks to the paper underneath.

1. Mix dough as described below, shape immediately into three discs and refrigerate for about 30 minutes to an hour, until cold and firm but not rock hard.

2. Place wax or parchment paper cut to the size of your cookie sheet on your working surface. Sprinkle with flour. Place perfection strips on paper, then position dough between them. Using flour as needed, roll out dough to desired thickness (I always use 1/4 inch--the thickest strips) and pick up paper with dough and place on cookie sheet, cover in plastic wrap, then immediately place in freezer. Stack all flattened dough sheets like this. Freeze until solid, at least 2 hours.

3. Remove one dough sheet at a time from the freezer and cut shapes from frozen dough and bake immediately or store in freezer-safe container. Re-roll scraps just once.

To keep the paper from sliding as you roll your dough, let the paper hang over the edge of your work table and push your tummy solidly up against it to keep it in place as you roll out. It will seem silly at first but it totally works. 

Keeping your dough constantly cold will ensure your cookies don't spread much. These cookies will spread a tiny bit in the oven, which is not a huge deal if you are just eating these, but if you are a maniac like me and want a great trick to fixing spread edges that are a little too wabi sabi for your needs, just use a microplaner on the edges for more even, straight lines.

Admission: of all the cookie doughs I've made, this one is my favorite to eat raw. I know I know, you're not supposed to, but I do it all the time. It is so yummy.

piping party

piping party

I'm not a terribly patient piper, since I am much better with a paint brush than a piping bag, but I really wanted the look  of piping on these cookies with the beautiful textured background. I cannot stop looking at the cute little bunnies on these cookies. A few small swipes of edible color dust defined their shapes really well.

MANDARIN MATCHA COOKIES

makes 15-30 cookies, depending on cutter size 

2 c. unsalted butter, soft but cool 

2 c. (425 g.) granulated sugar

3 mandarin oranges, zested, and one juiced

1 egg, room temperature

1 yolk, room temperature

1 tsp. vanilla extract

3 tsp. matcha green tea powder

1 tsp. sea or kosher salt

5 c. (635 g.) all-purpose flour

3 tsp. poppy seeds

Preheat oven to 350 degrees F. With a hand mixer, beat softened butter, sugar, salt, orange zest until just combined and smooth, about 2 minutes (stop before mixture begins to fluff up). Add eggs, vanilla extract, poppy seeds and matcha and mix for another minute. Add flour and beat just until dough comes together; do not over mix. 

Prepare dough as described above and bake cut out shapes for 9-14 minutes, depending on the size of the cookie shape. Cookies are done when edges just barely begin to brown and center is set (do not allow to brown too much). Be sure to bake the same size cookies together, and allow at least 2 inches space around each cookie. Once cooled, frost with royal icing if desired and store in an air-tight container.

happy Mother's Day to all the moms out there, mine especially

happy Mother's Day to all the moms out there, mine especially

Vegan Chocolate Cake by Molly Brodak

Happy Birthday to me! 

I visited my mom and sister recently back home in Michigan and mom made for me my favorite birthday cake she used to make when I was little: wacky cake.

Wacky cake is apparently a recipe created in the 40s when home bakers were rationing on account of World War II. It requires no eggs, no butter, and no milk. It's "wacky" because the recipe traditionally calls for you to make three wells in the dry mix--one for vanilla extract, one for oil, and the last for vinegar. Then you cover the whole thing with water, stir with a fork, and bake. 

Now, to be honest there's no real science behind this method, it seems to me just a clever way to make a recipe memorable. It really makes no difference to the outcome of the cake if you make the three little wells or not, as wacky-cake pros like my mom know.

Essentially, this is a great vegan cake, and with this inspiration in mind, I created a recipe for a very similar chocolate vegan cake. It's extremely soft, with a loose, wiggly crumb and incredible lightness. I like this even better than non-vegan chocolate cake, plus it brings back memories of home.

yes I am eating it with my hands

yes I am eating it with my hands

Now, the fact that wacky cake is usually baked as a sheet cake tells you something. This cake is SO tender that it is hard to work with...it's a terrible candidate for carving, and is so delicate it is hard to slice and tort, or even move the layers around unless you are very deft with cake-moving. I recommend baking this cake, too, in a 8x8 pan or as cupcakes. It doesn't have much structure because of the low protein content in this recipe. This recipe can easily be doubled for a 9x13 or similar larger pan.

painting with buttercream!

painting with buttercream!

Of course, thinking about what can be done with a sheet cake without having to carve it or slice it, I thought about a painting. I created this Spring-inspired "oil" painting using vegan margarine-based buttercream and created a fondant frame for it out of a mold I made from a fantastic old framed mirror in my bedroom. 

I painted the frame with edible gold coloring and dusted it with cocoa powder to antique it slightly. 

most of the frame was held up with rolled foil (you can see it in this pic) since I didn't want to waste a ton of fondant

most of the frame was held up with rolled foil (you can see it in this pic) since I didn't want to waste a ton of fondant

I altered the basic wacky cake recipe to boost flavor and add richness. I promise the addition of coffee will not impart any coffee flavor to the cake, just deepen the chocolate taste (trust me, I'm not a big coffee fan so I wouldn't do this if the coffee flavor was detectable). Starbucks (and lots of other retailers) now make fantastic microground instant coffee that is miles away from those horrible crystals your parents used to drink--these are perfect for this recipe. Any cocoa powder will do--my favorite grocery store cocoa powder is Hershey's Special Dark, but feel free to use your fancy high quality cocoa powder if you have it. Dutch-process cocoa is better in this recipe than natural cocoa because it will make a richer, darker cake and the acidity of natural cocoa is not needed since we have plenty of other acidic ingredients here, but natural (such as regular Hershey's cocoa powder) will substitute ok.

Bonus: all you need for this recipe is a whisk!

Vegan Chocolate Cake

1 c. unsweetened soy or nut milk of your choice

1 packet microground instant coffee or espresso (to make one cup)

1 tsp. apple cider vinegar

3/4 c. (160 g.) sugar

1/2 tsp. salt

1/3 c. vegetable or canola oil

1 tsp. vanilla extract

1 c. (133 g.) all-purpose flour

1/3 c. (34 g.) Dutched cocoa powder (Hershey’s Special Dark or KAF Black Cocoa work great)

3/4 tsp. (4 g.) baking soda

1/2 tsp. (2 g.) baking powder

Preheat oven to 350 degrees F and lightly grease and flour 8x8 baking pan or line cupcake pan with liners. Heat nondairy milk until warm in microwave; stir in coffee powder until dissolved. Add vinegar and set aside. Whisk flour, cocoa, baking soda, and baking powder in a small bowl until thoroughly mixed. In a larger bowl, combine milk mixture with sugar, oil, vanilla, and salt, and whisk until lightly frothy. Add dry mixture in two batches, and whisk. Mixture can have small lumps. Pour into prepared pans and bake for about 18-22 minutes or until center is set. Allow to cool completely before icing with your favorite frosting.

art saved my life. thanks for another year!

art saved my life. thanks for another year!

A Better Bundt by Molly Brodak

Poundcake is the shortbread of the cake world. But despite its apparent simplicity, it's not necessarily easy to master. Both are best plain, without any bits or babs mucking things up because, all in all, both are really just an excuse to eat butter.

Bundt cake is poundcake, btw, just baked in a bundt pan. True poundcake is made into loafs, but that is the only difference. I use the terms interchangeably.

While I am bestowing the priceless gift of my secretest bundt cake recipe upon you, I'm also offering up some of the amazing photos of a bundt cake shoot I participated in with local Atlanta brilliants: Haley Sheffield, photography; Kristine Cholakian Cooke, stylist; and Caroline Worth-Bruno, floral designer and heavenly gem.

photo by Haley Sheffield, styling by Kristine Cholakian Cooke

photo by Haley Sheffield, styling by Kristine Cholakian Cooke

Survey the world of pound/bundt cake recipes online and you will find the classic quatre quarts recipe--basically just butter, sugar, eggs, and flour--and you will also find recipes that resemble regular cake recipes. I say "regular" because they include a chemical leavener like baking powder or baking soda. And that is a huge mistake.

Have you ever had a bundt cake stick to the pan, break apart when you try to remove it, or have a pitted, unsmooth crust? If so, blame your baking soda.

Let me explain. Baking soda (and baking powder is just baking soda with some added neutralizers to slow baking soda's frantic and immediate bubbling) causes the air pockets in your batter to expand. Once the bubbly structure is created, the batter network cures, trapping the air and creating the soft, tender texture of cake. As the batter expands, it falls all over itself in your pan chaotically, pressing itself into the sides of your pan, forcing its mass up like a slow-mo volcano.

photo by Haley Sheffield, styling by Kristine Cholakian Cooke, flowers by Caroline Worth-Bruno

photo by Haley Sheffield, styling by Kristine Cholakian Cooke, flowers by Caroline Worth-Bruno

Pound cake batter, on the other hand, is a lazy batter. These cakes take much longer to bake than regular cakes because this batter is just sort of gently sitting there, lazily basking in your oven...

Without a chemical leavener, pound cake expands just a little only due to the steam escaping from the finer air bubbles in your batter. The batter that is touching your pan forms an even, smooth crust because it's not expanding very energetically against the pan. If you have the right recipe, your bundt should never break upon removal from the pan, but fall out smoothly with an even, golden crust. 

Unless you are using a pan from the dark ages, you shouldn't need any grease or flour in your pan either. In fact, those things can just cause an interference. Any normal nonstick bundt pan should be fine on its own. You should also not need to pry any instrument into your pan to get your bundt baby out. A few taps, a few gentle shakes, and it should plop out easily when inverted.

That being said, I do spray my older pans with a light flash from Baker's Joy, just for the extra assurance. I have made bundts with and without it, and it really makes no discernable difference except in my very old aluminum antique pans.

Bundt is done when the top cracks and the dough inside the crack looks just barely set.

Now, being "plain" as it is, a bit of acid in poundcake is always a good idea. That's why lemon or citrus poundcake is always the most popular variety, but blueberry and strawberry are also great. I love lemon poundcake with strawberry icing (just puree some fresh or frozen strawberries, strain, and add the juice to the icing recipe below), and I really really love orange poundcake. 

If you want really good, tangy lemon icing, you're going to need a pinch of citric acid, which can be found in the canning section of your grocery store. Lemon juice alone will only take you so far. Make it as thick or as thin as you like, but don't sub water for the heavy cream or milk--that bit of dairy really helps give the icing substance.

photo by Haley Sheffield, styling by Kristine Cholakian Cooke

photo by Haley Sheffield, styling by Kristine Cholakian Cooke

And if you really really want to gild the lily, you can brush your warm poundcake with simple syrup and it will be even more ridiculously moist, edging up to a pudding-like texture, if that's your kind of thing. Either way, this cake is better the next day, once the crust softens.

I tested the basic triad of poundcake recipes--all butter, butter and cream cheese, and butter and sour cream, and a combo of both. As expected, the sour cream and cream cheese (which has been my go-to poundcake recipe for years) was the best. The acid of the sour cream works a little like buttermilk, keeping the dough tender, and the moisture of the cream cheese keeps the cake tender enough to not really need a sugar syrup soak.

The texture of this cake should be velvety and dense.

Take your time creaming this batter, since there are no chemical leaveners, this mechanical whipping process is the only source of bubbles/rise for your cake--don't hurry through it.

This recipe makes an ample amount of batter, about 7 cups, enough for two 8" loafs or one large bundt pan. It can be halved if using a smaller pan. Because the pan size doesn't matter as much with pound cake in terms of how the batter will perform, you can put as much or as little of this batter in your pans and it should all come out basically the same, just be sure to adjust your time down for smaller amounts of batter or smaller pans.

For chocolate poundcake, just add 1/2 c. of good quality cocoa powder. photo by Haley Sheffield, styling by Kristine Cholakian Cooke

For chocolate poundcake, just add 1/2 c. of good quality cocoa powder. photo by Haley Sheffield, styling by Kristine Cholakian Cooke

PERFECT POUNDCAKE

1 1/2c. (3 sticks) very soft room-temperature unsalted butter

8 oz. very soft cream cheese

3 c. (600 g.) sugar

6 large eggs, room temperature

2 tsp. sea or kosher salt

1 Tbsp. vanilla extract

3 c. (375 g.) all-purpose flour 

1/2 c. (114 g.) sour cream (not reduced fat)

1 lemon, orange, or two limes, zested and juiced

For the icing:

1 c. powdered sugar

2 Tbsp. heavy cream or whole milk

1 tsp. vanilla extract or other flavor

3 Tbsp. fresh lemon juice

1/8 tsp. citric acid

Preheat oven to 350 degrees F. Spray large bundt pan or two loaf pans with Baker's Joy if desired. 

Mix butter and cream cheese with a hand mixer or in a stand mixer until completely combined and no chunks of cream cheese remain. Add sugar, salt, and finely grated rind of citrus fruit(s) and cream on medium high speed for about 4 minutes, until mixture is fully combined and fluffy. Add eggs, one at a time, beating thoroughly on high speed and scraping bottom. Once the last egg is added, whip for an additional 4 minutes until batter is pale and fluffy, scraping sides and bottom consistently.

Add 1/2 of the flour and mix on low until just combined. Add sour cream and extracts and juice and mix again on low until just combined. Add the remaining flour and mix until just combined.

Scoop batter into pan(s) and bake for about 60 minutes, or until tops are split. Allow to cool in pan for five minutes, remove, then level bottoms if desired, and allow to cool completely before icing. 

To make the icing, add the liquids to the powdered sugar and mix until smooth. Pour over cakes and allow to set before slicing. Store cakes under a glass dome or an overturned bowl.

photo by Haley Sheffield, styling by Kristine Cholakian Cooke, flowers by Caroline Worth-Bruno

photo by Haley Sheffield, styling by Kristine Cholakian Cooke, flowers by Caroline Worth-Bruno

Chamomile Lime Swan Cake with Honey Swiss Meringue Buttercream by Molly Brodak

chamom14.JPG

My birthday cake has come early this year.

Oh man, this cake makes my heart explode! Confetti shreds of heart all over everything!

I was inspired by those 50's style swan planters you used to see everywhere, and thinking about a very pastel palette since I've got wedding brain right now. Flavorwise, I'm ready as hell for Spring right now, and I wanted to make a cake that tasted like Spring.

gah!

gah!

I'm an enormous fan of tea, as you might realize from this post, but chamomile has never been my favorite...for the central reason that it is not actually tea, but a herbal infusion. That being said, chamomile is such a wonderful flavor, light and fresh and floral without being perfume-y like rose. Lime adds a nice balance to the sweetness, and the honey Swiss meringue buttercream triangulates the Spring attitude of this cake.

I don't expect you'll make your chamomile-lime cake into a swan as I have done, but in case you're interested in how I made it happen I've shown a bit more behind-the-scenes type pics in this post than usual.

You'll start by making a very strong tea by letting six tea bags infuse in a cup of hot water for 10 minutes. There's no danger of it turning bitter since, ahem, this is not actually tea. Be sure to use a brand that is composed of 100% chamomile flowers, or just buy them in bulk at your health food store.

This cake is a sturdy, somewhat coarse-crumbed cake but is made very moist by the sour cream and the tea soak that comes after baking. Its flavors are very subtle and light, and would be delicious plain or with a simple whipped cream topping instead of the admittedly elaborate Swiss meringue buttercream I used.

Speaking of that, let's start there. Let me first say, I don't really like Swiss meringue buttercream all that much. For some bakers, it is the only kind of buttercream they use. It's supposed to be more sophisticated and refined than regular old American buttercream (the kind with just butter and powered sugar) but to me this idea is sort of, I don't know, elitist and untrue. I've got this and this meringue-free buttercream to prove it. Logically, making meringue then cramming a pound of butter into it while it deflates just doesn't make sense to me in any case.

BUT still, I thought I'd give it a whirl. With the honey addition, this buttercream whips up a bit more stable and rich, plus the honey flavor is amazing.

Honey Swiss Meringue Buttercream

4 large egg whites

1 c. (213 g.) sugar

1 lb. (4 sticks) very soft unsalted butter

1/2 tsp. fine sea salt or kosher salt

1/3 c. (60 g.) honey

1 tsp. vanilla extract

Wipe bowls and beaters with white vinegar. Combine egg whites and sugar in a glass or metal bowl and set over a saucepan of simmering water. Cook, stirring constantly, until sugar is dissolved and temperature on a candy thermometer reaches 140 degrees F (warm, not hot).

Remove from heat and transfer to a large glass or metal bowl. Using a stand mixer or a hand mixer, whip mixture until very stiff peaks are reached and the bowl feels neutral to the touch (no longer warm). Add chunks of softened butter in small amounts and whip until fully incorporated. If mixture becomes soupy/warm, refrigerate for a few minutes and whip again until it comes together.

Add salt, honey, and vanilla, whip until combined.

Oh, this cake is so good, so fragrant right out of the oven. You might be tempted to add more lime to this cake, because it doesn't seem like enough, but trust me, you don't want to lose the delicate chamomile flavor under the power of lime. The tea soak at the end of this recipe is crucial to keeping the balance of flavors in order.

For my cake, I carved the body of the swan from cake and added a wired gumpaste head/neck, all of which was covered in fondant. This is actually not the best cake for carving because of its open crumb, so if you're looking to make a swan cake like mine I would suggest this cake recipe instead, which is very fine-crumbed and ideal carving material.

 no template, I was JUST WINGING IT -.-

 no template, I was JUST WINGING IT -.-

I picked some peonies and roses from my box of leftover sugar flowers and made a bunch of dusty miller to match the pastel palette I had in mind. The wings were attached with sugar glue, and I let them firm up with some saran wrap stuffed behind them so they'd stick up a bit.

this is the fun part

this is the fun part

I loved making this cake, and I loved eating it just as much. Sometimes people ask me if I have a hard time cutting into these creations I spend hours and hours making. Not at all. It might actually be the best part. Cakes are ephemera, after all, just like all good things are.


Chamomile Lime Cake

1 3/4 c. (201 g.) cake flour (White Lily)

1 3/4 tsp. (8 g.) aluminum-free baking powder

1 1/2 c. (298 g.) sugar

1 c. strongly-brewed chamomile tea (6 teabags, steep for 10 minutes)

3/4 tsp. fine sea salt or kosher salt

2 large eggs, room temperature

2 large egg yolks, room temperature

1/3 c. canola or vegetable oil

1/3 c. sour cream

1 tsp. vanilla extract or 1/2 vanilla bean, scraped

Zest and juice of one lime

Preheat oven to 350 degrees F. Grease and flour two 8" pans and line bottoms with parchment.

Whisk flour and baking powder together thoroughly in a small bowl and set aside.  

Place sugar, salt, and 1/3 c. of tea (reserve the rest for later use) in a small saucepan and heat until sugar is mostly melted--do not allow to boil. Pour sugar mixture into a large bowl. Zest lime and squeeze juice into the sugar mixture. Add oil, vanilla, sour cream, and beat until smooth, about 2 minutes. 

Add 1/3 of the flour mixture and beat until smooth and lump-free. Repeat with the remaining 2/3rds, scraping the bottom of the bowl and making sure no flour lumps remain. By hand, mix in eggs, then yolks, one at a time until fully combined. 

Divide batter between pans and tap on the counter to remove large air bubbles. Bake for 20 minutes or so until centers are fully set and spring back when pressed. Allow to cool for 10 minutes, then invert cakes onto cooling rack.

Prepare tea simple syrup soak by mixing the remaining strong tea with 1/3 c. of sugar in a microwavable container and microwave for about a minute or until the sugar is completely dissolved.

Level cakes by slicing off their crown and brush or drizzle with tea soak. Allow cakes to cool and rest, then fill, and frost.

Yuzu S'mores Cake by Molly Brodak

It's January, which means two things: it's citrus season (yay!) and it's Kookie House's birthday (yay!!!!!). This cake is here to celebrate both, and it is so so so good. I can't handle how delicious this cake is. To which the copious exclamation points above attest.

There are a lot of s'mores cake recipes out there, but this one is unique--the intensely tangy yuzu juice takes the s'mores flavor combo out of sickly sweet territory and into transcendently delicious territory. This cake is unexpectedly addictive.

Yuzu is a grapefruity-lemon-like fruit from Japan and it's just starting to get popular in the States. Word on the street is you might see a lot of Yuzu in the near future since it was recently discovered it grows well in the Pacific Northwest and growers are starting to invest in it.

In the meantime, you can find some very good fresh bottled Yuzu juice from Japan. I found this bottle above at my local Asian mart. You can also buy it online of course, although it can get pricey that way. If you don't live near a cool Asian food mart and you don't feel like shelling out the bucks for an online order, you can easily swap in regular fresh lemon juice in this cake and it will be just as tasty.

This cake is rich and moist and serves to seal in the graham crackers which keeps them miraculously crispy even though they are baked into the cake. The ganache I use here is even easier to make than buttercream, so don't be intimated. Make the ganache first so it can set up a bit.

GANACHE

This is my basic ganache recipe I use for filling or frosting cakes. If you want a lighter, more buttercream-like texture, whip with whisk beaters for ONE minute (don't over-whip or it can separate). Feel free to double or triple this recipe for bigger batches--this makes just enough to fill this cake.

10.5 oz. chopped dark or semisweet chocolate (chips will work, but finely chopped chocolate is better)

5 fl. oz. heavy whipping cream

Place chopped chocolate into a heat-safe bowl. Microwave or heat cream on stovetop until just barely simmering around the edges. Pour slowly and evenly over chocolate. Twist bowl back and forth gently so the cream covers the chocolate completely. Allow to sit for 30 seconds, then begin stirring with spatula or whisk. Mix until completely smooth and no lumps remain. Allow to cool for at least 30 minutes before using. If it sets up solidly before using, microwave for a few seconds until it softens to peanut-butter like consistency. 

Now, a lot of "marshmallow" frosting recipes are really just meringue--egg whites, sugar, lots of tiny bubbles. And yeah, you can cover your cake with light and foamy meringue and toast it, and that's nice. But if you want something really marshmallowy, you need to get some gelatin involved. 

It seemed most logical here to use actual marshmallows in the recipe than deal with gelatin, since the marshmallows will offer up their gelatin to us AND their marshmallowy flavor. This marshmallow frosting is ridiculously delicious and its simple, I promise. I could eat gobs of it alone. You can just glob it on your cake or pipe it--either way it looks beautiful. And toasted?? Even better. I used my kitchen blowtorch which is one of those kitchen tools you don't use all of the time, but when you need it you really need it.

yasss

yasss

MARSHMALLOW FROSTING

3 large egg whites, cold

1/2 c. cold water

1 1/2 c. (325 g.) sugar

1 1/2 tsp. (12 g.) corn syrup

1 c. mini marshmallows

1 tsp. fresh lemon juice

1 tsp. vanilla extract

Prepare piping bag if using. Mix all ingredients except marshmallows, vanilla and lemon juice in a large metal or glass bowl. Place over a pot of simmering water (do not let the bowl touch the water). Using electric beaters, beat steadily on medium high speed for about 7 minutes or until mixture holds stiff peaks. Remove from heat and add remaining ingredients, beat until marshmallows are completely melted. Scoop immediately into prepared piping bag or swirl onto cake quickly, as this frosting will set up as it cools.

Now onto the main event. This is my new go-to winter cake. 

omg

omg

YUZU S'MORES CAKE

3 c. (350 g.) cake flour (White Lily)

3 tsp. (10 g.) aluminum-free baking powder

3 large eggs

2 large egg whites

2 c. (400 g.) sugar

1/3 c. yuzu juice

1 tsp. fine sea salt or kosher salt

1 c. sour cream

1 Tbsp. vanilla extract or one vanilla bean, scraped

2/3 c. canola or vegetable oil

18 graham crackers (2 packages) broken into large pieces


Preheat oven to 350 degrees F.

Whisk flour and baking powder together thoroughly in a large bowl and set aside. Cover bottoms of greased and floured 8" or 9" pans with broken graham crackers. Beat eggs, egg whites, sugar, salt, vanilla and yuzu juice for one minute (use a timer) on medium high until mixture is thick. Continue to beat while adding in sour cream in spoonfuls, and beat until smooth for 30 seconds.

Add oil to the flour mixture and beat until a dough forms. Add 1/3 of the liquid mixture and beat until smooth and lump-free. Repeat with the remaining 2/3rds, scraping the bottom of the bowl and making sure no lumps remain.

Divide batter among pans and tap on the counter to remove large air bubbles. Bake for 35 minutes or so until centers are fully set and spring back when pressed. Allow to cool for 10 minutes, then invert cakes onto cooling rack. Allow cakes to cool completely before filling with ganache and covering with marshmallow frosting. Toast with blowtorch.